
How to Connect, Write and Test Your Phoenix App In Livebook
Sometimes, I just want a quick way to validate my logic through quick tests without having to open my code editor.
For example, when I want to confirm that:
- A function transforms a map as I expect it to.
- Import CSV data in the database using existing Ash resource.
- And more.
Today, I am showing you how to connect your existing Ash and Phoenix app with Livebook and be able:
- To call any module and function from your app in Livebook .
- Write new module in Livebook , like liveview and call them in your phoenix app.
- Or even have fun writing your code and seeing the results just there.
First, I am assuming that you already know what Livebook is, and have it installed on your local machine. If not, then head to https://livebook.dev/ and install it.
Second, I am assuming that you have a phoenix application in your computer. If not go to https://www.phoenixframework.org/ and follow instruction to have a phoenix application in your computer.
If you are here, I am assuming that you have the livebook and a working Phoenix apps on your computer.
Erlang distribution system is what makes it possible to connect your app to livebook and vis versa. And we only need to add 2 information to your normal iex -S mix phx.server and make it connectable from Livebook.
You need to:
- Start your application with
iex --name myapp@127.0.0.1 --cookie secret -S mix phx.server - Open your livebook and specify
myapp@127.0.0.1as node andsecretas password or cookie to your app.
That’s all. Let us see it in action.
Start your Phoenix app:
iex --name socialfund @127 .0.0.1 --cookie secret -S mix phx.server
Then you will see below iex console. Remember social fund is the name of my application, so remember to use your application name.
iex (socialfund @127 . 0.0 . 1 ) 1 >
Press enter or click to view image in full size
The socialfund@127.0.0.1 is the name of our node with the IP address for the localhost network, thus, you can do this on a wide network by using the right network address.
Get Kamaro Lambert’s stories in your inbox
Join Medium for free to get updates from this writer.
Next, start your Livebook app like below, if you are using Linux. Windows might have a different way of starting livebook server. What is important here is to start your Livebook app.
➜livebook server

 [ Livebook ] Application running at http: //localhost:8080/?token=n2xxcudq6ffvpcccempjnnfouqvcjmpf
Then, open livebook in the browser and create a new book.
Then, under + Smart select Remote execution.
If you don’t have Kino package installed, your will be prompted to add it.
Click + Add and Restart Press enter or click to view image in full size Install the Kino package is not already present Next, inform Livebook what node to connect to.
In our case socialfund@127.0.0.1 is the node while secret is the cookie.
Go ahead and specify them.
Press enter or click to view image in full size
Press Ctrl + Enter or click Reevaluate button to connect to your applicaton from livebook.
To test whether it worked, I am going to retreive Ash domains from my application configurations with the following command in livebook as if I was to run it in the iex console.
Remember to replace :social_fund with your application name.
Application.get_env( :social_fund , :ash_domain )
You should see below results, with configured Ash domain. Press enter or click to view image in full size Let’s create a module in Livebook and attempt to run it in iex console.
Create the Generator module for the purpose of today’s demonstration. In your livebook, add below code, then reevaluate it.
defmodule Generator do

 @moduledoc "" "

 Generate fake data for testing

 " ""


 @doc "" "

 Generate random number for testing purpose

 " ""

 def number , do: Enum.random([ 0 , 1 , 2 , 3 , 4 , 5 , 6 , 7 , 8 , 9 ])


 @doc "" "

 Generate random text for testing purpose

 " ""

 def text , do: "Random text because I can write it"

 end
It should look like below. Press enter or click to view image in full size Once evaluated, you can call it from your iex console as if it was part of your existing application. Press enter or click to view image in full size This makes it much easier to test your code and ideas before writing them in your application. The same way you write module in your application codebase, you can write codes in Livebook and remotely execute it and vis versa.
This approach works for any Elixir application in a node.
Not only can you write simple applications, I have been able to write liveviews, complex component, even APIs in livebook before I ported them to the my application codebase. This empowered me to do quick tests and validate my ideas without feeling like pulling my hair.
What is even more interesting is that you can do this with your Elixir application application hosted anywhere on internet as network permits and it will just work fine.
Let me know in the comment below if you’ve used livebook to code.
Recently benchmark for concurrency implementation in different languages . In this article Piotr Kołaczkowski used Chat GPT to generate the examples in the different languages and benchmarked them. This was poor choice as I have found this article and read the Elixir example:
`tasks = for _ <- 1 .. num_tasks do Task . async ( fn -> : timer . sleep ( 10000 ) end ) end Task . await_many ( tasks , : infinity )`
And, well, it’s pretty poor example of BEAM’s process memory usage, and I am not talking about the fact that it uses 4 spaces for indentation.
For 1 million processes this code reported 3.94 GiB of memory used by the process in Piotr’s benchmark, but with little work I managed to reduce it about 4 times to around 0.93 GiB of RAM usage. In this article I will describe:
- how I did that
- why the original code was consuming so much memory
- why in the real world you probably should not optimise like I did here
- why using ChatGPT to write benchmarking code sucks (TL;DR because that will nerd snipe people like me)
What are Erlang processes? #
Erlang is well known of being language which support for concurrency is superb, and Erlang processes are the main reason for that. But what are these?
In Erlang process is the common name for what other languages call virtual threads or green threads , but in Erlang these have small neat twist - each of the process is isolated from the rest and these processes can communicate only via message passing. That gives Erlang processes 2 features that are rarely spotted in other implementations:
- Failure isolation - bug, unhandled case, or other issue in single process will not directly affect any other process in the system. VM can send some messages due to process shutdown, and other processes may be killed because of that, but by itself shutting down single process will not cause problems in any process not related to that.
- Location transparency - process can be spawned locally or on different machine, but from the viewpoint of the programmer, there is no difference.
The above features and requirements results in some design choices, but for our purpose only one is truly needed today - each process have separate and (almost) independent memory stack from any other process.
Process dictionary #
Each process in Erlang VM has dedicated mutable memory space for their internal uses. Most people do not use it for anything because in general it should not be used unless you know exactly what you are doing (in my case, a bad carpenter could count cases when I needed it, on single hand). In general it’s here be dragons area.
How it’s relevant to us?
Well, OTP internally uses process dictionary ( pdict for short) to store metadata about given process that can be later used for debugging purposes. Some data that it store are:
- Initial function that was run by the given process
- PIDs to all ancestors of the given process
Different processes abstractions (like gen_server / GenServer , Elixir’s Task , etc.) can store even more metadata there, logger store process metadata in process dictionary, rand store state of the PRNGs in the process dictionary. it’s used quite extensively by some OTP features.
“Well behaved” OTP process #
In addition to the above metadata if the process is meant to be “well behaved” process in OTP system, i.e. process that can be observed and debugged using OTP facilities, it must respond to some additional messages defined by sys module. Without that the features like observer would not be able to “see” the content of the process state.
Process memory usage #
As we have seen above, the Task.async/1 function form Elixir must do much more than just simple “start process and live with it”. That was one of the most important problems with the original process, it was using system, that was allocating quite substantial memory alongside of the process itself, just to operate this process. In general, that would be desirable approach (as you really, really, want the debugging facilities ), but in synthetic benchmarks, it reduce the feasibility of such benchmark.
If we want to avoid that additional memory overhead in our spawned processes we need to go back to more primitive functions in Erlang, namely erlang:spawn/1 ( Kernel.spawn/1 in Elixir). But that mean that we cannot use Task.await_many/2 anymore, so we need to workaround it by using custom function:
`defmodule Bench do def await ( pid ) when is_pid ( pid ) do # Monitor is internal feature of Erlang that will inform you (by sending # message) when process you monitor die. The returned value is type called # "reference" which is just simply unique value returned by the VM. # If the process is already dead, then message will be delivered # immediately. ref = Process . monitor ( pid ) receive do { : DOWN , ^ ref , : process , _ , _ } -> : ok end end def await_many ( pids ) do Enum . each ( pids , & await / 1 ) end end tasks = for _ <- 1 .. num_tasks do # `Kernel` module is imported by default, so no need for `Kernel.` prefix spawn ( fn -> : timer . sleep ( 10000 ) end ) end Bench . await_many ( tasks )`
We already removed one problem (well, two in fact, but we will go into details in next section).
All your lists are belongs to us now #
Erlang, like most of the functional programming languages, have 2 built-in sequence types:
- Tuples - which are non-growable product type of the values, so you can access any field quite fast, but adding more values is performance no-no
- (Singly) linked lists - growable type (in most case it will have single type values in it, but in Erlang that is not always the case), which is fast to prepend or pop data from the beginning, but do not try to do anything else if you care about performance.
In this case we will focus on the 2nd one, as there tuples aren’t important at all.
Singly linked list is simple data structure. It’s either special value [] (an empty list) or it’s something called “cons-cell”. Cons-cells are also simple structures - it’s 2ary tuple (tuple with 2 elements) where first value is head - the value in the list cell, and another one is the “tail” of the list (aka rest of the list). In Elixir the cons-cell is denoted like that [head | tail] . Super simple structure as you can see, and perfect for the functional programming as you can add new values to the list without modifying existing values, so you can be immutable and fast. However if you need to construct the sequence of a lot of values (like our list of all tasks) then we have problem. Because Elixir promises that list returned from the for will be in-order of the values passed to it. That mean that we either need to process our data like that:
`def map ( [ ] , _ ) , do: [ ] def map ( [ head | tail ] , func ) do [ func . ( head ) | map ( tail , func ) ] end`
Where we build call stack (as we cannot have tail call optimisation there, of course sans compiler optimisations). Or we need to build our list in reverse order, and then reverse it before returning (so we can have TCO):
`def map ( list , func ) , do: do_map ( list , func , [ ] ) def map ( [ ] , _func , agg ) , do: : lists . reverse ( agg ) def map ( [ head | tail ] , func , agg ) do map ( tail , func , [ func . ( head ) | agg ] ) end`
Which one of these approaches is more performant is irrelevant 1 , what is relevant is that we need either build call stack or construct our list twice to be able to conform to the Elixir promises (even if in this case we do not care about order of the list returned by the for ).
1
Sometimes body recursion will be faster, sometimes TCO will be faster. it’s impossible to tell without more benchmarking. For more info check out superb article by Ferd Herbert .
Of course we could mitigate our problem by using Enum.reduce/3 function (or writing it on our own) and end with code like:
`defmodule Bench do def await ( pid ) when is_pid ( pid ) do ref = Process . monitor ( pid ) receive do { : DOWN , ^ ref , : process , _ , _ } -> : ok end end def await_many ( pids ) do Enum . each ( pids , & await / 1 ) end end tasks = Enum . reduce ( 1 .. num_tasks , [ ] , fn _ , agg -> # `Kernel` module is imported by default, so no need for `Kernel.` prefix pid = spawn ( fn -> : timer . sleep ( 10000 ) end ) [ pid | agg ] end ) Bench . await_many ( tasks )`
Even then we build list of all PIDs.
Here I can also go back to the “second problem* I have mentioned above. Task.await_many/1 also construct a list . it’s list of return value from all the processes in the list, so not only we constructed list for the tasks’ PIDs, we also constructed list of return values (which will be :ok for all processes as it’s what :timer.sleep/1 returns), and immediately discarded all of that.
How we can better? See that all we care is that all num_task processes have gone down. We do not care about any of the return values, all what we want is to know that all processes that we started went down. For that we can just send messages from the spawned processes and count the received messages count:
`defmodule Bench do def worker ( parent ) do : timer . sleep ( 10000 ) send ( parent , : done ) end def start ( 0 ) , do: : ok def start ( n ) when n > 0 do this = self ( ) spawn ( fn -> worker ( this ) end ) start ( n - 1 ) end def await ( 0 ) , do: : ok def await ( n ) when n > 0 do receive do : done -> await ( n - 1 ) end end end Bench . start ( num_tasks ) Bench . await ( num_tasks )`
Now we do not have any lists involved and we still do what the original task meant to do - spawn num_tasks processes and wait till all go down.
Arguments copying #
One another thing that we can account there - lambda context and data passing between processes.
You see, we need to pass this (which is PID of the parent) to our newly spawned process. That is suboptimal, as we are looking for the way to reduce amount of the memory (and ignore all other metrics at the same time). As Erlang processes are meant to be “share nothing” type of processes there is problem - we need to copy that PID to all processes. it’s just 1 word (which mean 8 bytes on 64-bit architectures, 4 bytes on 32-bit), but hey, we are microbenchmarking, so we cut whatever we can (with 1M processes, this adds up to 8 MiBs).
Hey, we can avoid that by using yet another feature of Erlang, called registry . This is yet another simple feature that allows us to assign PID of the process to the atom, which allows us then to send messages to that process using just name, we have given. While atoms are also 1 word that wouldn’t make sense to send it as well, but instead we can do what any reasonable microbenchmarker would do - hardcode stuff :
`defmodule Bench do def worker do : timer . sleep ( 10000 ) send ( : parent , : done ) end def start ( 0 ) , do: : ok def start ( n ) when n > 0 do spawn ( fn -> worker ( ) end ) start ( n - 1 ) end def await ( 0 ) , do: : ok def await ( n ) when n > 0 do receive do : done -> await ( n - 1 ) end end end Process . register ( self ( ) , : parent ) Bench . start ( num_tasks ) Bench . await ( num_tasks )`
Now we do not pass any arguments, and instead rely on the registry to dispatch our messages to respective processes.
One more thing #
As you may have already noticed we are passing lambda to the spawn/1 . That is also quite suboptimal, because of difference between remote and local call . This mean that we are paying slight memory cost for these processes to keep the old module in memory. Instead we can use either fully qualified function capture or spawn/3 function that accepts MFA (module, function name, arguments list) argument. We end with:
`defmodule Bench do def worker do : timer . sleep ( 10000 ) send ( : parent , : done ) end def start ( 0 ) , do: : ok def start ( n ) when n > 0 do spawn ( & __MODULE__ . worker / 0 ) start ( n - 1 ) end def await ( 0 ) , do: : ok def await ( n ) when n > 0 do receive do : done -> await ( n - 1 ) end end end Process . register ( self ( ) , : parent ) Bench . start ( num_tasks ) Bench . await ( num_tasks )`
Results #
With given Erlang compilation:
`Erlang/OTP 25 [erts-13.2.2.1] [source] [64-bit] [smp:8:8] [ds:8:8:10] [async-threads:1] Elixir 1.14.5 (compiled with Erlang/OTP 25)`
Note no JIT as Nix on macOS currently 2 disable it and I didn’t bother to enable it in the derivation (it was disabled because there were some issues, but IIRC these are resolved now). 2 Nixpkgs rev
bc3ec5ea
The results are as follow (in bytes of peak memory footprint returned by /usr/bin/time on macOS):
| Original | 45047808 | 452837376 | 4227715072 |
|---|---|---|---|
| Spawn | 43728896 | 318230528 | 2869723136 |
| Reduce | 43552768 | 314798080 | 2849304576 |
| Count | 43732992 | 313507840 | 2780540928 |
| Registry | 44453888 | 311988224 | 2787237888 |
| RemoteCall | 43597824 | 310595584 | 2771525632 |
As we can see we have reduced the memory use by about 30% by just changing from Task.async/1 to spawn/1 . Further optimisations reduced memory usage slightly, but with no such drastic changes.
Can we do better?
Well, with some VM flags tinkering - of course.
You see, by default Erlang VM will not only create some data required for handling process itself 3 : 3 Again, word here mean 8 bytes on 64-bit and 4 bytes on 32-bit architectures.
| … | … | | — | — | | Erlang process | 338 words when spawned, including a heap of 233 words. |
– Erlang Efficiency Guide: 11. Advanced
As we can see, there are 105 words that are required and 233 words which are used for preallocated heap. But this is microbenchmarking, so as we do not need that much of memory (because our processes basically does nothing), we can reduce it. We do not care about time performance anyway. For that we can use +hms flag and set it to some small value, for example 1 .
In addition to heap size Erlang by default load some additional data from the BEAM files. That data is used for debugging and error reporting, but again, we are microbenchmarking, and who need debugging support anyway (answer: everyone, so do not do it in production). Luckily for us, the VM has yet another flag for that purpose +L .
Erlang also uses some ETS (Erlang Term Storage) tables by default (for example to support process registry we have mentioned above). ETS tables can be compressed, but by default it’s not done, as it can slow down some kinds of operations on such tables. Fortunately there is, another, flag +ec that has description:
Forces option compressed on all ETS tables. Only intended for test and evaluation.
Sounds good enough for me.
With all these flags enabled we get peak memory footprint at 996257792 bytes.
Compare it in more human readable units.
| Original code | 3.94 GiB |
|---|---|
| Improved code | 2.58 GiB |
| Improved code with flags | 0.93 GiB |
Result - about 76% of the peak memory usage reduction. Not bad.
Summary #
First of all:
Please, do not use ChatGPT for writing code for microbenchmarks.
The thing about micro benchmarking is that we write code that does as little as possible to show (mostly) meaningless features of the given technology in abstract environment. ChatGPT cannot do that, not out of malice or incompetence, but because it used (mostly) good and idiomatic code to teach itself, microbenchmarks rarely are something that people will consider to have these qualities. It also cannot consider other features that wetware can take into account (like our “we do not need lists there” thing). ∎
Motivation behind this
Hugo ‘s Elixir Radar newsletter recently posted this very useful article on batch updates with ecto by Fabian Becker, that you should definitely read.
This reminded me of some cool stuff that we used to do with ecto working at V7 in the early days of the Darwin product. We actually no longer do this now, because it’s a much larger system, so it’s all about caching, rather than overoptimising, but back then, it fixed a bottleneck, got ous out of some serious downtime and improved performance by an order of mangitude.
We still do cool stuff, of course, but just different kinds of cool stuff.
Anyway, this will be a brief on two of these cool things
Using SQL to specify values, avoiding roundtrips during inserts
The UNNEST method Fabian uses in his article to pass in arrays of values for batch updates can also be used with inserts. In fact, you can Repo.insert_all a query that does a select of relevant data and it works great.
This has a really good use for aggregates, or for any sort of data transformation.
For a simple example, say you want to track the number of posts and comments on a daily basis. You will have a cron job or something similar.
Basic solution
post_count = Repo . aggregate ( Post , :count , :id ) comment_count = Repo . aggregate ( Comment , :count , :id ) Repo . insert_all ( Metric , [ %{ post_count : post_count , comment_count : comment_count , date : Date . today ( ) } ] )
This works great, but it requires n extra queries for n fields of the metric. Here, it’s just two, so that’s fine, but in reality, it will be more, and each could be expensive.
So the tempation is to try and offload that too the db by just doing one complex query.
Advanced solution
source = Post |> join ( :left , [ p ] , c in Comments , on : true ) |> select ( %{ post_count : count ( p . id ) , comment_count : count ( c . id ) , date : fragment ( "TODAY()" ) } ) Repo . insert_all ( Metric , source )
Ok, so now it’s just a single trip to the database, but I can almost guarantee in this basic example, it’s overall slower.
In other examples, it often WILL be faster, but not as fast as it could be.
Sidenote: Our Scenario at V7
In our scenario, we were recording a metric every 30 seconds and it was 7 fields, across 3 or 4 tables. So the join was more efficient than querying separately for each field, but it was still a very expensive join.
Eventually, we got to a point where it could not finish in 30 seconds, resulting in resource starvation and downtime.
Expert Solution
We solved it by making use of an insert feature most people aren’t aware off. Your source can be a list of maps, but the values for the map keys can be queries returning 1 value.
In the simple example
Repo . insert_all ( Metric , [ %{ post_count : Post |> select ( [ p ] , count ( p . id ) ) , comment_count : Comment |> select ( [ c ] , count ( c . id ) ) , date : Date . today ( ) } ] )
We’ve eliminated a join, we still do just one trip to the db and it’s way faster.
Now, it’s not always going to be faster. It really all depends on how expensive your join is. But at some point, as the join gets expensive enough, this approach definitely wins out.
Master Solution
Of course, as your system becomes more complex, you just won’t be dealing with these kinds of optimisations. Instead, you’ll have some caching for these counts within Elixir, and simply insert a record using counts in the cache. You’ll probably also be recording these metrics in some sort of queue, so that if you get to a point where they get too expensive, you don’t end up in downtime.
Using placeholders in inserts
Let’s have a look at the expert solution one more time.
Repo . insert_all ( Metric , [ %{ post_count : Post |> select ( [ p ] , count ( p . id ) ) , comment_count : Comment |> select ( [ c ] , count ( c . id ) ) , date : Date . today ( ) } ] )
This query only inserts one record, and as part of that, it requires passing in one argument, Date.today() from Elixir into Postgres. That’s fine here, but what if we’re in a scenario where we’re inserting more records?
For example, we’re importing posts from a CSV, timestamps being a common example.
now = NaiveDateTime . utc_now post_data = file |> Enum . map ( & String . split ( &1 , " \n " ) ) |> Enum . map ( & String . split ( &1 , "," ) ) |> Enum . map ( fn [ title , body ] -> %{ title : title , body : body , inserted_at : now , updated_at : now } end ) Repo . insert_all ( post , post_data )
This will work, but if there are 1000 entries, we are sending 2000 copies of the value now into the database. That’s inefficient.
The Ecto team thought of this, though, by supporting placeholders.
now = NaiveDateTime . utc_now placeholders = %{ now : now } post_data = file |> Enum . map ( & String . split ( &1 , " \n " ) ) |> Enum . map ( & String . split ( &1 , "," ) ) |> Enum . map ( fn [ title , body ] -> %{ title : title , body : body , inserted_at : { :placeholder , :now } , updated_at : { :placeholder , :now } } end ) Repo . insert_all ( post , post_data , placeholders : placeholders )
With this approach, we get the same result, but only send a single copy of the value now .
Isn’t that awesome!?
I love parsing! I really do. There’s something very satisfying about converting input into usable data structures that help me accomplish some task.
Parsing is important. How well we construct those data structures and the quality of the structures we choose can massively impact the work that comes after. We should probably all be worrying about parsing a little more than we do.
The good news is that Elixir is the best language I have ever worked with for doing serious parsing. Let’s prove it. Let’s pull the data out of a SQLite database file using vanilla Elixir and some tricks from my Scrappy Programmer Livebook series . (You don’t need to have read that to follow along with this article. Everyone is welcome.)
Genie, Fetch Me Some Data
We need a database, with some data in it, in order to have something interesting to parse. Let’s programmatically create one. This is the one time we will reach for some helper libraries. We’ll use one to talk directly to SQLite and another to invent fake data. Here’s the code:
`Mix . install([ { :exqlite , "~> 0.23.0" }, { :faker , "~> 0.18.0" } ]) db_path = Path . join( System . tmp_dir!(), "db.sqlite3" ) { :ok , conn} = Exqlite.Sqlite3 . open(db_path) :ok = Exqlite.Sqlite3 . execute(conn, """ CREATE TABLE people ( id INTEGER PRIMARY KEY, name TEXT NOT NULL, age INTEGER NOT NULL, email TEXT NOT NULL ); CREATE UNIQUE INDEX person_email ON people(email); """ ) { :ok , statement} = Exqlite.Sqlite3 . prepare( conn, "INSERT INTO people (name, age, email) VALUES (?1, ?2, ?3)" ) Stream . repeatedly( fn -> name = Faker.Person . name() account = name |> String . downcase() |> String . replace( ~r{[^a-z]+} , "_" ) |> String . replace( ~r{_\z} , "" ) [name, Enum . random( 10 .. 100 // 1 ), " #{ account } @ #{ Faker.Internet . domain_name() } " ] end ) |> Stream . take( 150 ) |> Enum . each( fn values -> :ok = Exqlite.Sqlite3 . bind(conn, statement, values) :done = Exqlite.Sqlite3 . step(conn, statement) end ) :ok = Exqlite.Sqlite3 . release(conn, statement) IO . puts( "Database path: #{ db_path } " )`
Database path:  /tmp/db.sqlite3
:ok
We’re not really here to discuss this code, but, very briefly, it creates a new database table with four fields, adds on an index, and pumps 150 fake records into it. The only things in this code that effect what we are about to do are the fields in the table and index as well as the db_path variable. That holds the location of our database file in the temporary directory.
Let’s now use the real SQLite to browse through what we’ve created:
sqlite> SELECT * FROM people LIMIT 10;
1|Margret Ebert|39|margret_ebert@bahringer.net
2|Thad Pouros|74|thad_pouros@rodriguez.com
3|Susana Torp|50|susana_torp@ebert.biz
4|Mr. Michele Stroman|84|mr_michele_stroman@white.name
5|Kenna Okuneva|49|kenna_okuneva@koch.biz
6|Irwin Kohler|61|irwin_kohler@ledner.com
7|Daren Keeling|89|daren_keeling@collins.name
8|Viola Beer V|73|viola_beer_v@bayer.org
9|Edward Cummerata|47|edward_cummerata@lockman.biz
10|Nathan Halvorson|98|nathan_halvorson@kuhlman.biz

sqlite> SELECT * FROM people WHERE age >= 97;
10|Nathan Halvorson|98|nathan_halvorson@kuhlman.biz
27|Colten Kub DDS|98|colten_kub_dds@nolan.info
45|Randy Grimes|100|randy_grimes@grant.com
46|Mrs. Madisen Bashirian DVM|100|mrs_madisen_bashirian_dvm@prosacco.name
59|Paula Larkin|99|paula_larkin@abshire.com
63|Barney Walker|98|barney_walker@dooley.com
80|Daphney Carroll|100|daphney_carroll@jast.name
94|Rickey Balistreri DVM|97|rickey_balistreri_dvm@kuvalis.info
100|Bradford Schowalter|100|bradford_schowalter@okeefe.biz

sqlite> SELECT * FROM people WHERE id = 77;
77|Samanta Waelchi III|88|samanta_waelchi_iii@blanda.org

sqlite> SELECT * FROM people WHERE id = 142;
142|Darryl Dicki|62|darryl_dicki@sawayn.net

sqlite> SELECT * FROM people WHERE email = 'randy_grimes@grant.com';
45|Randy Grimes|100|randy_grimes@grant.com
Here we see five different queries that give us a feel for the data. The first two are table scans that require the database to read through the records to locate the ones that meet our criteria. There’s no index on the age field to speed that up. The next two queries are very efficient lookups by primary key and the final query is almost as optimized since it uses the email index.
These five queries represent our goal. We want to recreate these operations using just Elixir. Let’s to it!
I Hope Someone Brought A Map
An entire SQLite database is stored in just one file. That file contains the structural definitions for our table and index, all of the records we loaded into the table, the index that allows us to find records quickly by email , and a bit more. How do we find exactly what we’re after on this lush, tropical island? We need a map!
SQLite has got you covered. The file is predictable. While it can contain multitudes, it is constructed from simple abstractions that can be easily understood one by one. As we work our way through those layers, a map will emerge showing us precisely where the treasure we seek can be found.
The first abstraction is pages . While a large database might produce a huge file, all SQLite files are divided into equally sized chunks. One chunk is called a page. Each page contains a certain kind of data and can be dealt with largely independently from the other pages.
This means that the first step to understanding is just knowing the size of each page. Once we know that size, we can carve up the entire file and begin to make sense of the individual pieces. Therefore, it may not be too surprising to learn that all SQLite databases begin with a header that explains a handful of key details, including the page size! Let’s read that header:
`File . open!(db_path, [ :read , :binary ], fn f -> << "SQLite format 3\0" :: binary, raw_page_size :: integer - big - unit( 8 ) - size( 2 ), 1 :: integer - big - unit( 8 ) - size( 1 ), 1 :: integer - big - unit( 8 ) - size( 1 ), 0 :: integer - big - unit( 8 ) - size( 1 ), 64 :: integer - big - unit( 8 ) - size( 1 ), 32 :: integer - big - unit( 8 ) - size( 1 ), 32 :: integer - big - unit( 8 ) - size( 1 ), file_change_counter :: integer - big - unit( 8 ) - size( 4 ), page_count :: integer - big - unit( 8 ) - size( 4 ), _first_freelist_trunk_page :: integer - big - unit( 8 ) - size( 4 ), _freelist_pages :: integer - big - unit( 8 ) - size( 4 ), _schema_cookie :: integer - big - unit( 8 ) - size( 4 ), 4 :: integer - big - unit( 8 ) - size( 4 ), _default_page_cache_size :: integer - big - unit( 8 ) - size( 4 ), _largest_root_page_for_vacuum :: integer - big - unit( 8 ) - size( 4 ), 1 :: integer - big - unit( 8 ) - size( 4 ), _user_version :: integer - big - unit( 8 ) - size( 4 ), 0 :: integer - big - unit( 8 ) - size( 4 ), _application_id :: integer - big - unit( 8 ) - size( 4 ), 0 :: integer - big - unit( 8 ) - size( 20 ), file_change_counter :: integer - big - unit( 8 ) - size( 4 ), 3_046_000 :: integer - big - unit( 8 ) - size( 4 )>> = IO . binread(f, 100 ) page_size = case raw_page_size do 1 -> 65_536 _ -> raw_page_size end %{ page_size : page_size, page_count : page_count} end )`
%{page_count: 7, page_size: 4096}
The first 100 bytes of a SQLite database file are a collection of integers that explain the various features contained within. The excellent documentation explains what each of those values indicate. The most important one to us is the raw_page_size . If you look through the pattern match above, you will see some other interesting details like a page_count . That can be helpful to see the structure of the database, but you could also get it by dividing the file size by the page size.
Now, it may look like we are ignoring many of these values. To some extent that is true. This tutorial is not going to concern itself with free pages, for example, as we would only need to know about those if we were looking for empty pages to write new data into. However, don’t make the mistake of assuming that the parser we are building is a fragile snowflake. Pattern matching has allowed me to hardcode many expectations about the header. In the places where you see me matching against literal integer values I am ensuring that the database has the formats, schema versions, and text encoding that I expect. The final value even encodes the exact version of SQLite used to create the file 3_046_000 (“3.46.0”). If you try to use this code on anything it wasn’t prepared to handle, it will bail out noisily at this very first step. That makes it a lot easier to trust the results we are getting.
The rest of the code performs a trivial conversion to produce the actual page size and the output shows us that our file contains seven 4k pages.
The above pattern match was purposefully done in a very verbose format to specifically match the values given in the documentation. Many of those options are defaults though and others have much shorter forms. Let’s rewrite it into what we are more likely to encounter in the wild and wrap it in a function for easy reuse:
`parse_header = fn bytes, f -> << "SQLite format 3\0" , raw_page_size :: 2 * 8 , 1 :: 1 * 8 , 1 :: 1 * 8 , 0 :: 1 * 8 , 64 :: 1 * 8 , 32 :: 1 * 8 , 32 :: 1 * 8 , file_change_counter :: 4 * 8 , page_count :: 4 * 8 , _first_freelist_trunk_page :: 4 * 8 , _freelist_pages :: 4 * 8 , _schema_cookie :: 4 * 8 , 4 :: 4 * 8 , _default_page_cache_size :: 4 * 8 , _largest_root_page_for_vacuum :: 4 * 8 , 1 :: 4 * 8 , _user_version :: 4 * 8 , 0 :: 4 * 8 , _application_id :: 4 * 8 , 0 :: 20 * 8 , file_change_counter :: 4 * 8 , 3_046_000 :: 4 * 8 >> = bytes page_size = case raw_page_size do 1 -> 65_536 _ -> raw_page_size end %{ file : f, page_size : page_size, page_count : page_count} end open_db = fn path, func -> File . open!(path, [ :read , :binary ], fn f -> db = f |> IO . binread( 100 ) |> parse_header . (f) func . (db) end ) end open_db . (db_path, & Function . identity / 1 )`
%{file: #PID<0.184.0>, page_count: 7, page_size: 4096}
The code above also includes a new function that opens a file, parses the header, and passes the key database details into an anonymous function we can provide for further processing of the contents.
We’ve found the pages. Now we have to make sense of them.
Climb a Tree, Dear
Somewhere in the seven pages of our database we know that we will find a table full of data and an index mapping email addresses to records in that table. Tables and indexes are stored in the second of SQLite’s abstractions: B-trees . A B-tree is a handy tree format for efficiently storing large chunks of data (like pages) in a branching structure that can quickly get you to the data you seek. The tree itself is made of pages that point to other pages. If you know where the root page of a tree is, you can find all of the other pages.
Three of the seven pages are the tree that holds the data in our table. Another three are a tree that holds the index. The only other page, the first one in the database, holds an abstraction we’ll look at a bit later that allows us to find both of those trees. The following image shows how these pages map to one another.
In order to follow the map of pages, we need to be able to read what is actually on them. Unsurprisingly, pages also have a predictable format including a header of their own that provides some key details about what you will find in its contents. The only gotcha when looking for this page header is to remember that the first 100 bytes of the database are the database header. That means that the header for page one starts 100 bytes in, but the header for all other pages is at the beginning of the page.
Again, we really only need a couple of key details from the page header to make sense of it. The first value we’re interested in is the type of page that it is. Does it hold a table or an index? Is it the actual table data or does it just point to other pages that hold the table data?
We saw before that SQLite databases are just a collection of pages. Well, pages are just a collection of cells . That means the other key element we need to know are how many cells are on this page. That’s in the header too. Let’s parse them out:
`parse_page = fn bytes, i -> start = if i == 1 , do : 100 , else : 0 <<raw_type :: 1 * 8 , _first_page_freeblock :: 2 * 8 , cell_count :: 2 * 8 , _raw_cell_content_start :: 2 * 8 , _fragmented_free_bytes :: 1 * 8 , rest :: binary>> = binary_slice(bytes, start, 12 ) type = case raw_type do 2 -> :interior_index 5 -> :interior_table 10 -> :leaf_index 13 -> :leaf_table end right_most_pointer = if type in [ :interior_index , :interior_table ] do <<right_most_pointer :: 4 * 8 >> = rest right_most_pointer else nil end %{ index : i, start : start, type : type, cell_count : cell_count, right_most_pointer : right_most_pointer } end read_page = fn %{ page_count : last_page} = db, i when i > 0 and i <= last_page -> :file . position(db . file, (i - 1 ) * db . page_size) db . file |> IO . binread(db . page_size) |> parse_page . (i) end open_db . (db_path, fn db -> Enum . map( 1 .. 3 // 1 , fn i -> read_page . (db, i) end ) end )`
[
  %{
    index: 1,
    start: 100,
    type: :leaf_table,
    cell_count: 2,
    right_most_pointer: nil
  },
  %{
    index: 2,
    start: 0,
    type: :interior_table,
    cell_count: 1,
    right_most_pointer: 5
  },
  %{
    index: 3,
    start: 0,
    type: :interior_index,
    cell_count: 1,
    right_most_pointer: 7
  }
]
This code is pretty similar to the earlier code that parsed the database header. We match some raw values, do some minor clean up, and return them in a data structure telling you what you need to know. You can see that I’ve pulled out some other details, like the right_most_pointer . We’ll get to what that is in a bit.
Here we also see a new function for reading pages out of the file. Given the index of any page we want to see, some simple math can tell us how many bytes of other pages to skip past. We can then read one chunk of page size bytes to get that page.
The end of this example uses that header parser and that page reading function to extract some details about the first three pages. Don’t worry too much about the first page just yet, but take note of 2 and 3 . One of them is a table page that will eventually lead us to the other two table pages and the other is the index counterpart. To follow those leads, we will need to make sense of the cells.
Living Things Are Made Of Cells
Conceptually, the cells in a page are just a list of values. When I show you how those values are laid out it may initially seem strange, but it makes a lot more sense when you think about how databases can change. Let’s look at a trivial example:
8whatever5small8whatever8whatever8whatever
Cells could just be laid out in order after the header. Each cell could begin with a number telling you how many bytes to read and be immediately followed by that content. The example above shows roughly what this would look like (although it is not in binary). Now consider that someone issues a SQL statement to modify the small field to be quiteabitbigger :
8whatever15quiteabitbigger8whatever8whatever8whatever
In order to accommodate this change most of the page has to be moved. All later values had to be shifted in order to make space for the now larger field. SQLite wants to minimize the need for changes due to edits.
To support that, it stores two things for each cell. The first is a pointer to where the cell content is in the page and then, at that location, it stores the actual content of the cell. When changes modify cells, SQLite can place the new content in any convenient space and simply adjust the pointer numbers to direct us to the right things. Have a fresh look at this earlier diagram:
The cell pointers are those simple numbers following immediately after the header and growing towards the end of the page. The cell contents themselves will start at the end of the page and grow backwards toward the beginning. This leaves a large chunk of empty space in the middle for use when edits cause changes. Here’s an animation of how SQLite will layout the first three cells as they are added:
Luckily, understanding cell layout is harder than actually parsing the cells. We just need to read some numbers after the header and follow those to extract the contents.
This does require another new element of the SQLite format called a varint . You’ll see the code to parse these special numbers in the following example, but I’m not going to explain them just yet. I promise that we will get there soon. In the meantime, let’s read some cell contents:
`parse_varint = fn bytes, start -> Enum . reduce_while( 0 .. 8 , { 0 , 0 }, fn offset, {int, size} -> <<high_bit :: 1 , new_int :: 7 >> = binary_part(bytes, start + offset, 1 ) cond do size == 8 -> { :halt , { Bitwise . bsl(int, 8 ) + new_int, size + 1 }} high_bit == 0 -> { :halt , { Bitwise . bsl(int, 7 ) + new_int, size + 1 }} true -> { :cont , { Bitwise . bsl(int, 7 ) + new_int, size + 1 }} end end ) end parse_cells = fn bytes, page -> cell_start = page . start + if is_nil(page . right_most_pointer), do : 8 , else : 12 cells = 0 .. (page . cell_count - 1 ) // 1 |> Enum . map( fn i -> <<content_start :: 2 * 8 >> = binary_part(bytes, i * 2 + cell_start, 2 ) content_start end ) |> Enum . map( fn content_start -> case page . type do :interior_index -> <<left_child_pointer :: 4 * 8 >> = binary_part(bytes, content_start, 4 ) {payload_bytes, p_size} = parse_varint . (bytes, content_start + 4 ) { left_child_pointer, binary_part(bytes, content_start + 4 + p_size, payload_bytes) } :interior_table -> <<left_child_pointer :: 4 * 8 >> = binary_part(bytes, content_start, 4 ) {integer_key, _size} = parse_varint . (bytes, content_start + 4 ) {left_child_pointer, integer_key} :leaf_index -> {payload_bytes, p_size} = parse_varint . (bytes, content_start) binary_part(bytes, content_start + p_size, payload_bytes) :leaf_table -> {payload_bytes, p_size} = parse_varint . (bytes, content_start) {rowid, i_size} = parse_varint . (bytes, content_start + p_size) { rowid, binary_part(bytes, content_start + p_size + i_size, payload_bytes) } end end ) Map . put(page, :cells , cells) end read_page = fn %{ page_count : last_page} = db, i when i > 0 and i <= last_page -> :file . position(db . file, (i - 1 ) * db . page_size) bytes = IO . binread(db . file, db . page_size) page = parse_page . (bytes, i) parse_cells . (bytes, page) end open_db . (db_path, fn db -> read_page . (db, 1 ) end )`
%{
  index: 1,
  start: 100,
  type: :leaf_table,
  cell_count: 2,
  right_most_pointer: nil,
  cells: [
    {1,
     <<7, 23, 25, 25, 1, 129, 119, 116, 97, 98, 108, 101, 112, 101, 111, 112,
       108, 101, 112, 101, 111, 112, 108, 101, 2, 67, 82, 69, 65, 84, 69, 32,
       84, 65, 66, 76, 69, 32, 112, 101, 111, ...>>},
    {2,
     <<6, 23, 37, 25, 1, 111, 105, 110, 100, 101, 120, 112, 101, 114, 115, 111,
       110, 95, 101, 109, 97, 105, 108, 112, 101, 111, 112, 108, 101, 3, 67, 82,
       69, 65, 84, 69, 32, 85, 78, 73, ...>>}
  ]
}
That’s a lot of code, so let’s break it down. Again, for now, just think of the code that parses varints as a magical number reader. Inside the cell parsing code, we first check if this is a kind of page that would include a right_most_pointer . When that’s present, it pushes the start of the cells a little further into the page.
Immediately after that check is where the action is. That first call to Enum.map/2 is what reads all the cell pointers, converting them into simple integers that show where the content for that cell starts. The following call to Enum.map/2 is what actually reads those contents. Unfortunately, cell contents are slightly different for the four different types of pages in our database. That’s why this section branches on the page type and uses four different techniques.
This code redefines read_page/2 to add in cell parsing whenever we fetch one.
We will talk about what those cells actually hold in a moment, but you can already see from the output that we have managed to extract some kind of structured data pairs of numbered binary blobs. Onward to deblobification!
Integers of Varying Sizes
Many things in binary formats involve telling you what you are about to read, and potentially the size of it, then giving you the thing to read. The way to tell you what to read is to put some magic number in front of it. That number can probably be pretty small. If there are less than 256 things you could need to read, one byte will do. Of course, let’s say you are told to read some arbitrarily long text that the user typed in. Now we need another number to tell you how long the text is. How large does that size indicator need to be? Well, it would have to be large enough to encode the maximally large text that a user could enter. But if we throw these large numbers around everywhere and users only enter ten digits at a time, we’re wasting some serious space.
Varints are the cure for this disease. They are a way to encode an integer of varying lengths. If you only need a small number, they take up one byte. They scale all the way up to nine bytes for the largest values that SQLite supports. To read one, you keep going until you read a byte where the highest-order bit is a 0 or you reach the ninth byte. That sounds more complex than it is. Here are all of the possible combinations:
0bbbbbbb
1bbbbbbb 0bbbbbbb
1bbbbbbb 1bbbbbbb 0bbbbbbb
1bbbbbbb 1bbbbbbb 1bbbbbbb 0bbbbbbb
1bbbbbbb 1bbbbbbb 1bbbbbbb 1bbbbbbb 0bbbbbbb
1bbbbbbb 1bbbbbbb 1bbbbbbb 1bbbbbbb 1bbbbbbb 0bbbbbbb
1bbbbbbb 1bbbbbbb 1bbbbbbb 1bbbbbbb 1bbbbbbb 1bbbbbbb 0bbbbbbb
1bbbbbbb 1bbbbbbb 1bbbbbbb 1bbbbbbb 1bbbbbbb 1bbbbbbb 1bbbbbbb 0bbbbbbb
1bbbbbbb 1bbbbbbb 1bbbbbbb 1bbbbbbb 1bbbbbbb 1bbbbbbb 1bbbbbbb 1bbbbbbb bbbbbbbb
The 1 or 0 at the beginning of each byte tells you whether to keep reading or stop respectively. You don’t need it for the bottom case because you always stop if you read nine bytes. The b bits are what you actually combine to form the numbers.
This system makes it easy for SQLite to encode values using only the number of bytes needed, without a lot of extra padding. And why does that matter? Records, my good friend. Records.
Building a Record Player
Databases are made up of pages, organized into B-trees. Pages are made up of cells. Cells are made up of records . Are we having fun yet?
That binary blob we saw when we parsed out the cell values is a record . A record is a header indicating the types and sizes of all the fields that follow, immediately followed by the contents of those fields. As the table at the link shows, a type 1 means you are reading a single byte integer for that field while a 6 is an eight byte integer. Odd values above 13 are a way to indicate textual content and a size with one number. Be sure to look at the table. It’s clever!
The following code is an Elixirification of that table:
`parse_record = fn bytes -> {header_bytes, h_size} = parse_varint . (bytes, 0 ) h_size |> Stream . unfold( fn read_bytes -> if read_bytes < header_bytes do {column, c_size} = parse_varint . (bytes, read_bytes) {column, read_bytes + c_size} else nil end end ) |> Enum . to_list() |> Enum . map_reduce(header_bytes, fn 0 , read_bytes -> { nil , read_bytes} 1 , read_bytes -> <<int :: 1 * 8 >> = binary_part(bytes, read_bytes, 1 ) {int, read_bytes + 1 } 2 , read_bytes -> <<int :: 2 * 8 >> = binary_part(bytes, read_bytes, 2 ) {int, read_bytes + 2 } 3 , read_bytes -> <<int :: 3 * 8 >> = binary_part(bytes, read_bytes, 3 ) {int, read_bytes + 3 } 4 , read_bytes -> <<int :: 4 * 8 >> = binary_part(bytes, read_bytes, 4 ) {int, read_bytes + 4 } 5 , read_bytes -> <<int :: 6 * 8 >> = binary_part(bytes, read_bytes, 6 ) {int, read_bytes + 6 } 6 , read_bytes -> <<int :: 8 * 8 >> = binary_part(bytes, read_bytes, 8 ) {int, read_bytes + 8 } 7 , read_bytes -> <<flt :: 8 * 8 >> = binary_part(bytes, read_bytes, 8 ) {flt, read_bytes + 8 } 8 , read_bytes -> { 0 , read_bytes} 9 , read_bytes -> { 1 , read_bytes} n, read_bytes when n >= 12 and rem(n, 2 ) == 0 -> size = div(n - 12 , 2 ) text = binary_part(bytes, read_bytes, size) {text, read_bytes + size} n, read_bytes when n >= 13 and rem(n, 2 ) == 1 -> size = div(n - 13 , 2 ) text = binary_part(bytes, read_bytes, size) {text, read_bytes + size} end ) |> elem( 0 ) end read_page = fn %{ page_count : last_page} = db, i when i > 0 and i <= last_page -> :file . position(db . file, (i - 1 ) * db . page_size) bytes = IO . binread(db . file, db . page_size) page = parse_page . (bytes, i) page = parse_cells . (bytes, page) Map . update!(page, :cells , fn cells -> Enum . map(cells, fn bytes when is_binary(bytes) -> parse_record . (bytes) {other, bytes} when is_binary(bytes) -> {other, parse_record . (bytes)} cell -> cell end ) end ) end open_db . (db_path, fn db -> read_page . (db, 1 ) end )`
%{
  index: 1,
  start: 100,
  type: :leaf_table,
  cell_count: 2,
  right_most_pointer: nil,
  cells: [
    {1,
     ["table", "people", "people", 2,
      "CREATE TABLE people (\n  id INTEGER PRIMARY KEY,\n  name TEXT NOT NULL,\n  age INTEGER NOT NULL,\n  email TEXT NOT NULL\n)"]},
    {2,
     ["index", "person_email", "people", 3,
      "CREATE UNIQUE INDEX person_email ON people(email)"]}
  ]
}
The function heads inside of the Enum.map_reduce/3 call line up perfectly with the table from the documentation. This code also redefines read_page/2 yet again to add in the new cell decoding functionality.
As you can see from the output, cell blob content has turned into meaningful data. Page one of a SQLite database is another B-tree. It just so happens that ours is small enough for the whole thing to fit on one page without any redirecting pages needed. That initial B-tree points to a SQL table describing all of the SQL objects encoded in this database file. It includes the page each item starts on among other details. This finally shows how I knew that our table began on page two and our index was on page three.
Lookup Tables
Now that we understand the first page, let’s look at a SQL table that spans multiple pages:
`open_db . (db_path, fn db -> read_page . (db, 2 ) end )`
%{
  index: 2,
  start: 0,
  type: :interior_table,
  cell_count: 1,
  right_most_pointer: 5,
  cells: [{4, 79}]
}
We know from earlier diagrams in this post that the content of our database table begins on page two and continues on pages four and five. If you look closely at the data structure above for page two, you will see that it does point to 4 and 5 .
Cells of interior pages, the pages that lead to other pages, are pairs of page numbers (called a left child pointer ) and keys. For the table above, there is only one cell and it contains the page number 4 paired with the key 79 . These pairs form a conceptual mapping where the page number preceding each key is the page where you will find all records with a rowid , an autoincrementing integer key, less than or equal to that key. When none of those cells contains the key you are looking for, you follow the right_most_pointer to the last page in the list. Here’s a diagram of how the lookup cells relate to each other:
Indexes have a very similar structure for their pages that point to other pages. Let’s look at our index to see this:
`open_db . (db_path, fn db -> read_page . (db, 3 ) end )`
%{
  index: 3,
  start: 0,
  type: :interior_index,
  cell_count: 1,
  right_most_pointer: 7,
  cells: [{6, ["micah_beahan@douglas.biz", 18]}]
}
The above is still a pair of page number and “key.” However, the key is a little more complex. It now contains all of the fields we are indexing on (just email in our case) followed by the rowid of the matching record in the actual table.
This is used in pretty much the same way. Emails less than (speaking in a manner of textual sorting) would be on the page number on the left, while greater emails would be on the right_most_pointer page. In indexes, the record that exactly matches the key would not appear on a deeper page, because finding it during a lookup means you already know what you need to know: the rowid to lookup in the actual table.
The rest of the index is pretty unsurprising. It just contains that email and rowid pairs. Here’s a look at one of those pages:
`open_db . (db_path, fn db -> read_page . (db, 6 ) end )`
%{
  index: 6,
  start: 0,
  type: :leaf_index,
  cell_count: 81,
  right_most_pointer: nil,
  cells: [
    ["ada_bauch@bechtelar.name", 144],
    ["albin_weber@wyman.com", 113],
    ["alexandra_morissette@mayer.info", 48],
    ["alfonzo_gusikowski@osinski.org", 133],
    ["ali_ortiz@fahey.info", 97],
    ["anibal_hudson@streich.biz", 136],
    ["ansel_kulas@leffler.biz", 150],
    ["ara_glover@zboncak.com", 62],
    ["arnoldo_hodkiewicz@thiel.info", 86],
    ["ashleigh_dietrich@okon.biz", 74],
    ["autumn_halvorson@conroy.biz", 106],
    ["barney_walker@dooley.com", 63],
    ["beth_fay@stiedemann.biz", 57],
    ["bette_gottlieb@harber.info", 129],
    ["blaise_sporer@bins.info", 56],
    ["blake_kulas@wiza.org", 126],
    ["bradford_schowalter@okeefe.biz", 100],
    ["breana_bergnaum@von.com", 107],
    ["cesar_schmidt@fahey.org", 75],
    ["chelsey_waters@stanton.net", 82],
    ["colten_kub_dds@nolan.info", 27],
    ["dakota_d_amore@heidenreich.biz", 120],
    ["dale_gorczany@jerde.com", 72],
    ["daphney_carroll@jast.name", 80],
    ["daren_keeling@collins.name", 7],
    ["dario_brown@dibbert.net", 36],
    ["darryl_dicki@sawayn.net", 142],
    ["dayne_goodwin@gusikowski.net", 134],
    ["deshaun_gutkowski@sipes.biz", 13],
    ["donna_wuckert@mills.name", 31],
    ["dr_lee_bruen_ii@bogisich.net", 22],
    ["dr_taylor_frami@roberts.biz", 71],
    ["dr_vidal_cartwright_i@cummerata.net", 127],
    ["ed_goyette@wuckert.net", 76],
    ["edward_cummerata@lockman.biz", 9],
    ["edyth_medhurst@hauck.net", 146],
    ["elouise_borer@ruecker.biz", 44],
    ["erick_strosin@schneider.info", 95],
    ["esteban_stracke@batz.biz", 110],
    ["etha_mohr@kerluke.net", 102],
    ["frances_grant_ii@vandervort.name", 24],
    ["gage_schaefer@waters.name", 105],
    ["gardner_fritsch_dvm@nicolas.info", ...],
    [...],
    ...
  ]
}
Query Time
We now understand all of the abstractions needed to make sense of this database. Let’s reproduce the five queries at the beginning of this article using Elixir. The first thing that we need is a function that can walk through an entire B-tree yielding the contents as they are passed:
`stream_table = fn db, root_page -> Stream . resource( fn -> [{read_page . (db, root_page), 0 }] end , fn [] -> { :halt , []} [{%{ type : :leaf_table } = page, 0 } | rest] -> {page . cells, rest} [{%{ cell_count : cell_count} = page, cell_count} | rest] -> {[], [{read_page . (db, page . right_most_pointer), 0 } | rest]} [{page, i} | rest] -> {next_page, _rowid} = Enum . at(page . cells, i) {[], [{read_page . (db, next_page), 0 }, {page, i + 1 } | rest]} end , fn _stack -> :noop end ) end open_db . (db_path, fn db -> db |> stream_table . ( 1 ) |> Enum . to_list() end )`
[
  {1,
   ["table", "people", "people", 2,
    "CREATE TABLE people (\n  id INTEGER PRIMARY KEY,\n  name TEXT NOT NULL,\n  age INTEGER NOT NULL,\n  email TEXT NOT NULL\n)"]},
  {2,
   ["index", "person_email", "people", 3,
    "CREATE UNIQUE INDEX person_email ON people(email)"]}
]
I’ve decided to represent table B-trees as Elixir Streams. This allows us to use the full suite of iterators to dig through them as needed.
The second thing we need is a way to link field definitions with the values we find in the tables. SQLite handles this by giving you the SQL used to create the table in the database schema listing. Let’s add some code to parse those out when the database is opened:
`parse_schema = fn db -> sqlite_schema = [ type : "TEXT" , name : "TEXT" , tbl_name : "TEXT" , rootpage : "INTEGER" , sql : "TEXT" ] schema = db |> stream_table . ( 1 ) |> Enum . into(%{ "sqlite_schema" => { 1 , sqlite_schema}}, fn {_rowid, values} -> row = Enum . zip( Keyword . keys(sqlite_schema), values) fields = case Keyword . fetch!(row, :type ) do "table" -> ~r{(\w+) \s +([^,\(\)]+?) \s *[,\)]} |> Regex . scan( Keyword . fetch!(row, :sql )) |> Enum . map( fn [_match, name, definition] -> { String . to_atom(name), definition} end ) "index" -> ~r{(\w+) \s *[,\)]} |> Regex . scan( Keyword . fetch!(row, :sql )) |> Enum . map( fn [_match, name] -> String . to_atom(name) end ) _other -> [] end key = if Keyword . fetch!(row, :type ) == "table" do Keyword . fetch!(row, :name ) else " #{ Keyword . fetch!(row, :tbl_name ) } : #{ Keyword . fetch!(row, :name ) } " end {key, { Keyword . fetch!(row, :rootpage ), fields}} end ) Map . put(db, :schema , schema) end open_db = fn path, func -> File . open!(path, [ :read , :binary ], fn f -> db = f |> IO . binread( 100 ) |> parse_header . (f) db |> parse_schema . () |> func . () end ) end open_db . (db_path, fn db -> db end )`
%{
  file: #PID<0.192.0>,
  page_count: 7,
  page_size: 4096,
  schema: %{
    "people" => {2,
     [
       id: "INTEGER PRIMARY KEY",
       name: "TEXT NOT NULL",
       age: "INTEGER NOT NULL",
       email: "TEXT NOT NULL"
     ]},
    "people:person_email" => {3, [:email]},
    "sqlite_schema" => {1,
     [
       type: "TEXT",
       name: "TEXT",
       tbl_name: "TEXT",
       rootpage: "INTEGER",
       sql: "TEXT"
     ]}
  }
}
Don’t loose a lot of sleep over this crude parsing code. I used regular expressions to pull out the values we need to care about for these examples. Obviously, SQLite has a SQL parser that it can leverage to understand these definitions. That’s outside the scope of what we are trying to do here.
The above code redefines open_db/2 to always perform this schema parsing and add the yielded field definitions along with the root page numbers to the database data structure. We can combine those definitions with the table records to produce a full table scan:
`build_table_row = fn fields, {rowid, values} -> Enum . zip_with(fields, values, fn {name, definition}, v -> v = if is_nil(v) and definition == "INTEGER PRIMARY KEY" do rowid else v end {name, v} end ) end scan_table = fn db, table_name -> {root_page, fields} = Map . fetch!(db . schema, table_name) db |> stream_table . (root_page) |> Stream . map( fn id_and_values -> build_table_row . (fields, id_and_values) end ) end open_db . (db_path, fn db -> db |> scan_table . ( "people" ) |> Enum . take( 10 ) end )`
[
  [id: 1, name: "Margret Ebert", age: 39, email: "margret_ebert@bahringer.net"],
  [id: 2, name: "Thad Pouros", age: 74, email: "thad_pouros@rodriguez.com"],
  [id: 3, name: "Susana Torp", age: 50, email: "susana_torp@ebert.biz"],
  [
    id: 4,
    name: "Mr. Michele Stroman",
    age: 84,
    email: "mr_michele_stroman@white.name"
  ],
  [id: 5, name: "Kenna Okuneva", age: 49, email: "kenna_okuneva@koch.biz"],
  [id: 6, name: "Irwin Kohler", age: 61, email: "irwin_kohler@ledner.com"],
  [id: 7, name: "Daren Keeling", age: 89, email: "daren_keeling@collins.name"],
  [id: 8, name: "Viola Beer V", age: 73, email: "viola_beer_v@bayer.org"],
  [
    id: 9,
    name: "Edward Cummerata",
    age: 47,
    email: "edward_cummerata@lockman.biz"
  ],
  [
    id: 10,
    name: "Nathan Halvorson",
    age: 98,
    email: "nathan_halvorson@kuhlman.biz"
  ]
]
This is the first query we ran back at the beginning of this article. It’s worth noting that, now that we have all the needed abstractions, the final call is essentially Enum.take(table, 10) . Scanning for specific ages isn’t much harder:
`open_db . (db_path, fn db -> db |> scan_table . ( "people" ) |> Enum . filter( fn row -> Keyword . fetch!(row, :age ) >= 97 end ) end )`
[
  [
    id: 10,
    name: "Nathan Halvorson",
    age: 98,
    email: "nathan_halvorson@kuhlman.biz"
  ],
  [id: 27, name: "Colten Kub DDS", age: 98, email: "colten_kub_dds@nolan.info"],
  [id: 45, name: "Randy Grimes", age: 100, email: "randy_grimes@grant.com"],
  [
    id: 46,
    name: "Mrs. Madisen Bashirian DVM",
    age: 100,
    email: "mrs_madisen_bashirian_dvm@prosacco.name"
  ],
  [id: 59, name: "Paula Larkin", age: 99, email: "paula_larkin@abshire.com"],
  [id: 63, name: "Barney Walker", age: 98, email: "barney_walker@dooley.com"],
  [
    id: 80,
    name: "Daphney Carroll",
    age: 100,
    email: "daphney_carroll@jast.name"
  ],
  [
    id: 94,
    name: "Rickey Balistreri DVM",
    age: 97,
    email: "rickey_balistreri_dvm@kuvalis.info"
  ],
  [
    id: 100,
    name: "Bradford Schowalter",
    age: 100,
    email: "bradford_schowalter@okeefe.biz"
  ]
]
Maximum Warp, Engage
The three remaining queries are meant to be more efficient than a table scan. They can skip right to the needed data using primary keys or supporting indexes. As we’ve seen, the way SQLite tables are stored, they are basically their own index for autoincrementing integer primary keys. Let’s write the code to walk those B-trees efficiently:
`lookup_by_id = fn db, id -> {root_page, fields} = Map . fetch!(db . schema, "people" ) Stream . iterate(read_page . (db, root_page), fn %{ type : :leaf_table } = page -> with id_and_values when is_tuple(id_and_values) <- Enum . find(page . cells, fn {rowid, _values} -> rowid == id end ) do build_table_row . (fields, id_and_values) end page -> next_page = page . cells |> Enum . find({page . right_most_pointer, nil }, fn {_pointer, rowid} -> id <= rowid end ) |> elem( 0 ) read_page . (db, next_page) end ) |> Enum . find( fn found -> not is_map(found) end ) end open_db . (db_path, fn db -> lookup_by_id . (db, 77 ) end )`
[
  id: 77,
  name: "Samanta Waelchi III",
  age: 88,
  email: "samanta_waelchi_iii@blanda.org"
]
This code still streams the content, but it’s smarter about how it moves from page to page. Since we pass in an id , it can check the keys to see which branches of the tree to follow, skipping any pages that won’t lead to what we’re after. When it reaches a leaf page, it knows the desired value must be on this page (assuming it exists) and a simple Enum.find/2 is used to retrieve it.
We know this first lookup was on page 4 , because the id was less than 79 . Let’s do one more lookup to force it to take the other path to page 5 :
`open_db . (db_path, fn db -> lookup_by_id . (db, 142 ) end )`
[id: 142, name: "Darryl Dicki", age: 62, email: "darryl_dicki@sawayn.net"]
This final query uses a very similar strategy, but for the email index. The differences are:
- We are checking emails instead of ID’s
- Exactly matching the key on an interior page ends the search without continuing to a leaf page
- When the email lookup succeeds, we use the resulting ID to perform a table lookup and get the actual record
Here’s the code:
`lookup_by_email = fn db, email -> {root_page, _fields} = Map . fetch!(db . schema, "people:person_email" ) key = Stream . iterate(read_page . (db, root_page), fn %{ type : :leaf_index } = page -> Enum . find(page . cells, fn [e, _rowid] -> email == e end ) page -> match = Enum . find( page . cells, {page . right_most_pointer, nil }, fn {_pointer, [e, _rowid]} -> email <= e end ) case match do {_pointer, [e, rowid]} when email == e -> [email, rowid] {pointer, _key} -> read_page . (db, pointer) end end ) |> Enum . find( fn found -> not is_map(found) end ) case key do [_email, rowid] -> lookup_by_id . (db, rowid) failed_match -> failed_match end end open_db . (db_path, fn db -> lookup_by_email . (db, "randy_grimes@grant.com" ) end )`
[id: 45, name: "Randy Grimes", age: 100, email: "randy_grimes@grant.com"]
Go Forth and Parse Things
The code above doesn’t handle every possible situation in a SQLite database. The most notable omission is that it’s possible for large content to overflow a page and end up on subsequent pages. A real solution needs to identify those cases and follow the leads.
However, we’ve handled a huge chunk of the SQLite file specification, securely and efficiently. We used some random file access, streaming content, and some seriously powerful binary pattern matching to make sense of a lot of data. These simple tools are very powerful ways to break down the content we are faced with.
If you enjoyed this post, I compare the parsing strategies used here with other techniques, like lexer and parser generators, in The Wild World of Parsing Livebook from my How to Train Your Scrappy Programmer series.
Discussion of this article is welcome on Elixir Forum .
Knowledge is power, and this is especially true for software. Telemetry puts software engineers in the driver’s seat by exposing the underlying performance of a system. Identifying possible problems before they occur and proactively fixing them is better than waiting for users to point them out for you.
Telemetry refers to the instrumentation of a system. When you use your web application and take action, you emit events. These events can be aggregated to calculate statistics—which we call metrics—or written to logs. Later, they can be decorated with information that links them together.
This article will start by examining the built-in telemetry and metrics that come for free with the Phoenix framework in Elixir. Elixir is built on the BEAM virtual machine, which is cluster-friendly, so distributed telemetry works out of the box.
What is telemetry?
The dictionary definition of telemetry is:
The process of practice of obtaining measurements for recording or display to a point at a distance. The transmission of measurements by the apparatus making them. Also apparatus used for this; information so transmitted.
In short - tele- - at a distance, -metry - of or pertaining to metrics.
At the heart of telemetry is designing software systems to make their internal operations visible externally - so that someone can take action based on that data. Those actions might be backward looking - how did this happen? They might also be forward-looking - if we don’t address this, then bad things might happen .
The relationship between a telemetry event and metrics
We call the raw actions coming out of a system events . A properly tagged set of continuous events is a critical resource in backward-looking telemetry, helping developers figure out what happened inside a system.
For forward-looking telemetry, an aggregated view of events is more useful. We call these events metrics .
The metrics reported might be operationally related - “the Dilithum Crystals cannae handle it Captain” or they might be business focused - “aggregated sales volume is 20% below trend” .
Starting a tech company in Linlithgow, where Engineer Scottie from Star Trek will be born in 2222, I obviously have Dilithium Crystals hanging about, but don’t worry young ’un, keep at it and the good tech will come your way - if you focus on the business side and get the money in.
Telemetry is a holistic game. The customer doesn’t care if they didn’t get your order because of a bug in your application software, or your server ran out of memory or rain came through the roof and fried all the electronics in the data center.
Before we start digging into it, let’s start looking at what telemetry comes out of the box with Phoenix. https://www.honeybadger.io/ “This was the easiest signup experience I’ve ever had. Amazing work.” — Andrew McGrath Get started for free Simple 5-minute setup — No credit card required
Quick start for telemetry with Phoenix
We’ll start by creating a dummy Phoenix application called Brock , a guid Scots word for badger. Be sure to install Elixir and Phoenix before continuing.
For this tutorial, we’ll be using Phoenix with Elixir 1.17.3, and assume that you already also have Postgres .
Building Brock will show us Phoenix’s telemetry tooling. (For readers for whom English is a 2nd language that’s good Scots , for all you native speakers, Saor Alba! [strikes Mel Gibson in Braveheart pose])
`mix phx.new brock`
You will notice as the terminal scrolls past that it has created a telemetry module in brock/lib/brock_web . Perhaps not surprisingly it is called telemetry.ex .
Next, do the rest of the setup:
`cd brock
mix ecto.create`
Depending on your setup you might need to fiddle with database passwords and hostnames that Phoenix uses to connect to Postgres. These configuration settings are usually in config/dev.exs
Looking for the telemetry module
Before we start the application, let’s poke around the existing code and see what we see.
In mix.exs we can see that Phoenix is pulling in the dependencies telemetry_poller and telemetry_metrics and they, in turn, pull in the base Erlang telemetry package telemetry . By default, Phoenix starts the telemetry supervisor and we are good to go.
The poller is a library that collects metrics from the underlying virtual machine - the BEAM. Remember that the customer doesn’t care what caused the problem - but for programmers understanding the behavior of the underlying BEAM or the operating systems or hardware is also important in telematics.
Skimming the code in telemetry.ex we can see that there are a load of metrics defined, for example:
`summary ( "phoenix.endpoint.start.system_time" , unit: { :native , :millisecond }), # … summary ( "brock.repo.query.total_time" , unit: { :native , :millisecond }, description: "The sum of the other measurements" ), # … summary ( "vm.memory.total" , unit: { :byte , :kilobyte }),`
Phoenix is collecting metrics from the Phoenix application itself, the Ecto repo instantiated inside the new Brock app, and the Erlang virtual machine. Later on, we will see how these are presented to the user.
This module is where you would add your custom metrics . In your code, you would write emitters for the telemetry events .
The only metric type already configured is summary , but there are another 4 available; counter , sum , last_value and distribution . You can read about them in the telemetry metrics documentation .
One last thing before we fire up Phoenix - let’s add operating system monitoring to receive VM-related events. We do this by editing the application function in mix.exs to add a new parameter :os_mon :
`# Type `mix help compile.app` for more information. def application do [ mod: { Brock . Application , []}, extra_applications: [ :logger , :runtime_tools , :os_mon ] ] end`
Now let’s see Phoenix telemetry in action! Start your Phoenix app in a shell:
`iex -S mix phx.server`
If we head over to the browser at http://localhost:4000/dev/dashboard , we can see the dashboard in action:

The built-in telemetry events are aggregated into metrics. The metrics collector is invoked periodically to collect them, and you can see that it does so on a 15-second cycle. It might appear that the telemetry poller is doing this, but it isn’t, it’s polling the OS and BEAM for you.
This is a presentation of holistic telemetry. Scan along the menu bar - you have tabs for metrics about the Operating System, the use of memory by the BEAM, the atom table, the supervision trees, details of running applications, and more - and a particular tab called Metrics - which displays the specific telemetry that we have looked at. Let’s have a peek:

A side-by-side comparison of the three tabs here ( Brock , Phoenix and VM ) will show that there is a graph generated for each metric defined in telemetry.ex . The Brock app is getting metrics from its Ecto repo which makes sense. Everybody needs to graph query execution time for their database, right?
You might have a single Phoenix app, starting multiple web applications with their own databases and Ecto repos. You’d probably want to see metrics from each one separately.
Phoenix is built on top of Elixir which is built on top of the BEAM and Erlang OTP. OTP is a very mature platform dating back to the 1990s with very strong operational support. You don’t build systems with 99.9999999% uptime (31.56 milliseconds downtime per year ) accidentally.
The entire stack is wired for telemetry with the veritable SASL (System Architecture Support Libraries) underpinning it all. OTP is instrumented, Phoenix is instrumented, and now it’s up to you to live up to the great traditions of the BEAM community.
Writing your own telemetry in Phoenix
Let’s start by adding new metrics to our stack. We’ll first add some new metrics for Brock in the telemetry.ex module. All the existing Phoenix/Repo metrics are summary so let’s mix it up a bit and start by defining metrics of all the other varieties:
`def metrics do [ # Phoenix Metrics # … # Database Metrics # … # VM Metrics # … summary ( "vm.total_run_queue_lengths.io" ), # Brock metrics counter ( "brock.bingobongo" ), sum ( "brock.bingobongo" ), last_value ( "brock.bingobongo" ), distribution ( "brock.bingobongo" ) ] end`
Pop over to the dashboard and refresh and we can see that the graphs are all there:

Adding our own telemetry events
Now let’s populate those graphs. To do that we need to emit telemetry events. Rather than go through the whole faff of setting up a dummy app, let’s just do it from the shell. It’s how Joe Armstrong always worked, so you are in good company.
At the prompt, we can just fire off telemetry events:
`iex ( 1 ) > :telemetry . execute ([ :brock ], %{ bingobongo: 9 }) :ok iex ( 2 ) > :telemetry . execute ([ :brock ], %{ bingobongo: 33 }) :ok iex ( 3 ) > :telemetry . execute ([ :brock ], %{ bingobongo: 5 }) :ok iex ( 4 ) > :telemetry . execute ([ :brock ], %{ bingobongo: 2.3 }) :ok`
And voila they appear in the dashboard:

We are aggregating the same event in 4 different ways here. The telemetry library we are using is written in Erlang which is why you are specifying the module name as an atom - Erlang doesn’t have a hierarchical module namespace like Elixir. There is a common open telemetry framework so that different monitoring solutions can be attached and this library is a key part of that.
Looking at the graphs, they don’t make much sense, which does make sense as they are fake metrics. In your real app you will need to work out what you want to measure and how.
There are various configuration options which you can explore and metrics data can be saved, although that is a bit more work.
Driving multiple metrics with the same telemetry events
A single telemetry event can feed multiple metrics. Let’s add a couple of new metrics in the telemetry.ex module:
`def metrics do [ # Brock metrics # ... sum ( "brock.bingo.jammies" ), sum ( "brock.bingo.jimmies" ) ] end`
Let’s get some telemetry events emitted:
`iex ( 5 ) > :telemetry . execute ([ :brock , :bingo ], %{ jammies: 53 , jimmies: 133 }) :ok iex ( 6 ) > :telemetry . execute ([ :brock , :bingo ], %{ jammies: 15 , jimmies: 15 }) :ok`
We get both graphs populated:

The metrics come in a natural hierarchical namespace which you need to design, so counter(“brock.bingo.bongo”) would be invoked like :telemetry.execute([:brock, :bingo], %{bongo: 11}) .
Telemetry event metadata
We can extend the model with event metadata. Event metadata allows you to slice and dice your metrics. Imagine you have a common registration process for developers, small companies, and enterprise users. Now imagine you have instrumented it! You want to understand its behaviour as a whole, but also be able to compare how different classes of users execute the process — tagging your events with event metadata is the how you would do that.
Adding event metadata is simple, and helps in extracting valuable data from all your metrics:
`:telemetry . execute ([ :db , :query ], %{ duration: 198 }, %{ table: "users" , operation: "insert" })`
When the telemetry event arrives at the metrics engine, it sets about tagging metrics. The metrics definitions include tag values which are used to extract tagging from the metadata. You can read about tagging in the documentation .
We can also build spanning that runs across multiple telemetry events, providing a holistic view of a process across the HTTP request lifecycle and beyond.
Distributed telemetry with Elixir clusters
So far we have looked at the -metry end of the telescope. Now it’s time to look at the tele- bit, getting data out of one system.
Leveraging the power of the BEAM we can start exploring telemetry. The first step is to build an Elixir cluster:
`cd ./config cp dev.exs dev2.exs`
Let’s edit dev2.exs so we can create a cluster. There are 2 settings we need to change. First up we rename the database:
`config :brock , Brock . Repo , username: "postgres" , password: "postgres" , hostname: "db" , database: "brock_dev2" ,`
Next, we need to bind the webserver to a different port:
`config :brock , BrockWeb . Endpoint , # Binding to loopback ipv4 address prevents access from other machines. # Change to `ip: {0, 0, 0, 0}` to allow access from other machines. http: [ ip: { 0 , 0 , 0 , 0 }, port: 4001 ],`
We also need to enable Phoenix.LiveReload in mix.exs :
`{ :phoenix_live_reload , "~> 1.2" },`
Now we are going to start two sessions in two different terminals. In one type:
`iex --sname dev1 --cookie jerko -S mix phx.server`
And in the other, type:
`MIX_ENV = dev2 mix ecto.create MIX_ENV = dev2 iex --sname dev2 --cookie jerko -S mix phx.server`
We should now have two instances of Phoenix running on two Erlang VMs - one bound to port 4000 and the other to 4001.
These two have the same cookies - we can check with :erlang.get_cookie() and we can make them into a cluster simply by pinging one from the other. My nodes are called dev1@gordon and dev2@gordon (“gordon” is the hostname), so executing :net_adm.ping(:'dev1@gordon') on dev2 will do the trick. You should get a pong back and not a pang (it’s Swedish humor, that is).
If we now run :erlang.nodes() in one shell we should get back a list with the other node name in it.
Clustered Elixir telemetry metrics
Now we’ll power over to the browser and look at the dashboard:

In the top right corner we can detach the dashboard and connect it to another node. Pretty neat, huh?
So how does Elixir do that? The best way to understand it is to compare the processes of the same BEAM from 2 dashboards:
First up is the view of dev1 from dev1 :

And then the same view from dev2 :

The process with the PID <0.50.0> on dev1 is <29582.50.0> on dev2 and all the way down the list.
The PID (or process ID) is a fundamental element of the BEAM and it has 3 visible parts (and an invisible one). The middle number is the number of the process on the machine it is running one, the left number is the number of the machine on the physical host, and the right number is the number of the physical node in the cluster.
The BEAM implements an actor model - discrete processes that communicate by sending each other messages. The PID is the postal address of the system even if the process is on another VM on another machine.
Thanks to PIDs, the whole core of Erlang is network transparent, and building clusters and working across a cluster is super-easy, like impossibly easy. So the dashboard running on one server can simply swap over and attach to the telemetry supervision tree on the other server and show that instead.
(The invisible number is the generation number, if a process dies and then a new process gets its PID, it’s a different PID. Generation numbers are a bit obscure, and you needn’t normally worry about them, but it’s the reason :erlang.list_to_pid/1 has a warning not to be used in production.)
Free distributed telemetry
But there’s more. Let’s start a new node with the command:
`iex --sname nophoenix --cookie jerko`
Now do the same ping trick ( :net_adm.ping(:'nophoenix@gordon') ) on another node. Joining this new node to one of the nodes in the cluster connects it to both. You can check by running :erlang.nodes() in both shells. This 3rd node, which is not running Phoenix, appears on our dashboard list and we can attach the dashboard to it:

Obviously the dashboard has a few less elements. The node under observation isn’t running Phoenix, so any of the Phoenix-specific bits aren’t there. The os_mon application isn’t started either so none of that, and telemetry is missing. But you can see how distributed telematics really can work in Elixir, with or without Phoenix.
Show this to your ops team
Often times a software shop will switch to Elixir and Phoenix for concurrency and performance reasons. The developers will often be excited but the ops teams are not as excited. This simple cluster trick is a good way to persuade your ops teams that they really need to understand how different working with the BEAM and OTP is to working with the JVM or PHP or Ruby or anything else.
It’s a best practice to take the live dashboard out of your non-development environments but the network transparency allows you to build a separate jump server inside your secure DMZ with monitored access. You can connect that to a production machine round the back securely and use your dashboard for diagnostics.
Show this to your security team
Once upon a time, when I was a BEAM guru at a big company, I tried and tried to persuade them to manage their cookies properly and have cluster separation across the piece. “Pfft” they said.
We later accidentally clustered the testing and production clusters while deploying a new system that was literally catching money falling from the sky. Then other words were said - words I blush at the memory of.
After that cookies and clustering were taken seriously. For a bit of fun, show your security team this command and watch them sweat :kernel.call(SomeNode, System, :cmd, \[“rm”, “-rf”, “/\*”\]) . ( Hint : is letting somebody on another machine in the cluster wipe your file system a good thing or a bad thing?)
When clustered Elixir is good, its very, very good—and when it’s bad, it’s horrid!
Use this trick for developing instrumented libraries
Imagine you are writing a library and you want it to emit telemetry events to be a good citizen. You can add the telemetry library to your application, then in development, you can just fire up an empty Phoenix app and attach it to the node you are running your library in. You’ll get a free dashboard!
Take telemetry to the next level in your Elixir and Phoenix apps
Phoenix telemetry out of the box gives you a great start on managing and inspecting your application. Phoenix’s telemetry events take you a long way, but your app is unique to you and your company, so you should add custom events relevant to your business model.
The Phoenix dashboard also brings in native BEAM telemetry by reporting the underlying metrics. However, the value of telemetry lies not in a particular measurement but upon acting on the measurement. It is mapping an event emitted to a metric on which there is a threshold. That threshold should alert a person to take action.
Telemetry without alerts and user actions is just vanity programming. You need to wire your instrumentation up to your operational processes, and Honeybadger can help with that. Honeybadger’s full-stack Phoenix monitoring platform allows you to graph, query, and alert on your Phoenix telemetry data.
In addition to Honeybadger’s Elixir error tracking, logging, and uptime monitoring tools, it’s the best way to gain real-time insights into your application’s health and performance.
Throttling and Blocking Bad Requests in Phoenix Web Applications with PlugAttack
Paraxial.io, 2022-02-02 A credential stuffing attack
Web applications that accept username and password pairs for authentication may experience credential stuffing by malicious clients. We use the term “credential stuffing” to refer to the act of using credentials, taken from a website’s public data breach, to preform many authentication attempts against victim accounts on a different website. This tutorial will demonstrate how to mitigate credential stuffing against a Phoenix Framework application, using PlugAttack .
1. Setup victim application, Orru
The victim web application for this tutorial is named orru , created with Elixir 1.12 and Phoenix 1.6. You must have both Elixir and the Phoenix Framework installed locally to run orru . See the appropriate guide for your operating system. PostgreSQL is always required, see the official wiki for installation instructions.
To check that your local environment is setup correctly, open the “Up and Running” page from the official Phoenix documentation , and follow the instructions to run the hello application locally. Running mix phx.server from the hello directory, then navigating to http://localhost:4000 in your web browser, should produce the “Welcome to Phoenix!” page. This confirms your local environment is configured for this tutorial.
Open a new terminal, change to the directory where you want orru to be located, then use git to get a copy of the orru source code:
`git clone https://github.com/paraxialio/orru.git`
Run the following commands to setup orru :
`cd orru
mix deps.get
mix ecto.setup`
Start the server:
`mix phx.server`
Open http://localhost:4000 in your web browser, and you should see a page that is similar to the hello application you setup earlier. The difference is the “Register” and “Log in” text in the upper right hand corner, indicating that orru has login functionality. The authentication code for orru was created with the mix phx.gen.auth mix task .
Create a user to ensure the authentication system is working correctly, with the credentials:
`Email    - crow@example.com
Password - crowSecret2022`
After completing registration, you should be taken to http://localhost:4000/ and see the message “User created successfully.” In the upper right hand corner of the page, “crow@example.com” should be visible, indicating you are now logged in. You have now completed the setup of orru , the victim web application for this tutorial.
2. Introducing the credential stuffing script, Envy
The credential stuffing program you use in this tutorial, envy , takes a list of username/password pairs as input, and attempts to log into each pair. Sending too many requests in a short period of time may overwhelm the victim server, so we introduce a rate limit argument to the program, which is used to determine how many login requests to send in a period of 1 minute.
Open a new terminal, change to the directory where envy will be located, then use git to download envy :
`git clone https://github.com/paraxialio/envy.git`
Run the following commands to setup envy :
`cd envy
mix deps.get`
Run the do_ato.exs script with no arguments:
`envy % mix run do_ato.exs
Account Takeover Tool v1.0
Example usage, default rate limit (60 requests per minute):
mix run do_ato.exs credentials_10.txt
Example usage, custom rate limit (100 requests per minute):
mix run do_ato.exs credentials_10.txt 100`
The do_ato.exs script takes two arguments. The first is a file containing username/password pairs, for use in credential stuffing. The second argument is an integer that represents the maximum number of HTTP requests per minute envy will send.
The command:
`mix run do_ato.exs credentials.txt 60`
means, “Use the username/password pairs in credentials.txt to send login requests at a maximum rate of 60 per minute”.
envy sends login requests to http://localhost:4000, and performs the necessary steps to send a POST request with a CSRF token, so the request will succeed. Now that you have envy and orru installed and running locally, let’s continue.
3. How to run Envy
Now you will be able to see an account takeover attack from both sides, as the person performing it and as the web application owner.
Ensure orru is running in one terminal:
`orru % mix phx.server`
Now switch to a different terminal, change to the envy directory, and run:
`mix run do_ato.exs credentials_10.txt`
If everything is setup correctly, the output will be:
`envy % mix run do_ato.exs credentials_10.txt
2022-01-31 21:11:57 crow0@example.com/crowSecret99  Login POST status 200
2022-01-31 21:11:58 crow1@example.com/crowSecret98  Login POST status 200
2022-01-31 21:11:59 crow2@example.com/crowSecret97  Login POST status 200
2022-01-31 21:12:00 crow@example.com/crowSecret2022  Login POST status 302
2022-01-31 21:12:01 crow3@example.com/crowSecret96  Login POST status 200
2022-01-31 21:12:02 crow4@example.com/crowSecret95  Login POST status 200
2022-01-31 21:12:03 crow5@example.com/crowSecret94  Login POST status 200
2022-01-31 21:12:04 crow6@example.com/crowSecret93  Login POST status 200
2022-01-31 21:12:05 crow7@example.com/crowSecret92  Login POST status 200
2022-01-31 21:12:06 crow8@example.com/crowSecret91  Login POST status 200`
Only one pair of credentials resulted in a successful login. The server responds with a 200 status code on a failed login because the HTTP POST request itself is successful, but the HTML response from the server indicates the login failed. When the login request is successful, the server replies with a 302.
The credentials_10.txt file only contains 10 pairs. Let’s increase the maximum number of requests per minute to 500, and use the credentials_100.txt file.
`envy % mix run do_ato.exs credentials_100.txt 500
2022-01-31 21:12:33 crow0@example.com/crowSecret0  Login POST status 200
2022-01-31 21:12:33 crow1@example.com/crowSecret1  Login POST status 200
...
2022-01-31 21:13:26 crow98@example.com/crowSecret98  Login POST status 200
2022-01-31 21:13:26 crow@example.com/crowSecret2022  Login POST status 302`
One client attempting hundreds of logins per minute is a clear sign of malicious intent. We will now add the PlugAttack project to orru , and examine different strategies for dealing with bad clients.
4. Adding PlugAttack to Orru
PlugAttack is a, “toolkit for blocking and throttling abusive requests”. To use it effectively, you should be familiar with the Plug project, the conn struct, and how Phoenix projects use plugs. Open the Github repo README and official documentation , then read through the examples. This should give you an idea of how the project is intended to be used. Now let’s add it to the orru project.
To add PlugAttack as a dependency, open orru/mix.exs and add one line:
`defp deps do [ { :bcrypt_elixir , "~> 2.0" } , { :phoenix , "~> 1.6.0" } , ... { :plug_cowboy , "~> 2.5" } , { :plug_attack , "~> 0.4.3" } # <- Add this line ] end`
Now add storage to the supervision tree with a child specification. Open orru/lib/orru/application.ex and add:
`def start ( _type , _args ) do children = [ # Add this line { PlugAttack.Storage.Ets , name : Orru.PlugAttack.Storage , clean_period : 60_000 } , # Start the Ecto repository Orru.Repo ,`
Run mix deps.get , then run orru to check everything is working correctly.
5. Throttle login requests per IP address
Now define the PlugAttack plug, with a rule that limits the number of login requests one IP address can make to 10 per minute.
Create a new file, orru/lib/orru/plug_attack.ex , and enter the following:
`defmodule Orru.PlugAttack do use PlugAttack rule "throttle login requests" , conn do if conn . method == "POST" and conn . path_info == [ "users" , "log_in" ] do throttle conn . remote_ip , period : 60_000 , limit : 10 , storage : { PlugAttack.Storage.Ets , Orru.PlugAttack.Storage } end end end`
The throttle rule is defined, but incoming requests need a way to reach it. Open orru/lib/orru_web/router.ex , define a new pipeline called :plug_attack , and add Orru.PlugAttack to it. Finally, add :plug_attack to the Authentication routes in the router.
`defmodule OrruWeb.Router do use OrruWeb , :router import OrruWeb.UserAuth pipeline :browser do ... end # Add this pipeline to the router pipeline :plug_attack do plug Orru.PlugAttack end pipeline :api do plug :accepts , [ "json" ] end ... ## Authentication routes scope "/" , OrruWeb do # Edit this line to include plug_attack pipe_through [ :browser , :redirect_if_user_is_authenticated , :plug_attack ] get "/users/register" , UserRegistrationController , :new ...`
Use the envy program to test if this rule works. Run orru with mix phx.server , then open envy in a different terminal and run these commands:
`envy % mix run do_ato.exs credentials_10.txt 500
2022-01-31 21:23:05 crow0@example.com/crowSecret99  Login POST status 200
2022-01-31 21:23:05 crow1@example.com/crowSecret98  Login POST status 200
2022-01-31 21:23:05 crow2@example.com/crowSecret97  Login POST status 200
2022-01-31 21:23:05 crow@example.com/crowSecret2022  Login POST status 302
2022-01-31 21:23:05 crow3@example.com/crowSecret96  Login POST status 200
2022-01-31 21:23:05 crow4@example.com/crowSecret95  Login POST status 200
2022-01-31 21:23:05 crow5@example.com/crowSecret94  Login POST status 200
2022-01-31 21:23:05 crow6@example.com/crowSecret93  Login POST status 200
2022-01-31 21:23:06 crow7@example.com/crowSecret92  Login POST status 200
2022-01-31 21:23:06 crow8@example.com/crowSecret91  Login POST status 200
envy % mix run do_ato.exs credentials_10.txt 500
2022-01-31 21:23:09 crow0@example.com/crowSecret99  Login POST status 403
2022-01-31 21:23:09 crow1@example.com/crowSecret98  Login POST status 403
2022-01-31 21:23:09 crow2@example.com/crowSecret97  Login POST status 403
2022-01-31 21:23:09 crow@example.com/crowSecret2022  Login POST status 403
2022-01-31 21:23:09 crow3@example.com/crowSecret96  Login POST status 403
2022-01-31 21:23:09 crow4@example.com/crowSecret95  Login POST status 403
2022-01-31 21:23:09 crow5@example.com/crowSecret94  Login POST status 403
2022-01-31 21:23:09 crow6@example.com/crowSecret93  Login POST status 403
2022-01-31 21:23:10 crow7@example.com/crowSecret92  Login POST status 403
2022-01-31 21:23:10 crow8@example.com/crowSecret91  Login POST status 403`
You have successfully limited the number of requests one IP address can send to 10 per minute.
6. How PlugAttack uses ETS (Erlang Term Storage)
Earlier you configured storage for PlugAttack, with the name Orru.PlugAttack.Storage . When an incoming request matches a rule you defined, it is placed in Erlang Term Storage, or ETS.
Run orru with iex -S mix phx.server . Then run:
`iex(2)> :ets . tab2list ( Orru.PlugAttack.Storage ) [ ]`
The output should be empty, because you did not send any login requests. Now make one failed login request in orru , through your web browser, then run tab2list again:
`iex(5)> :ets . tab2list ( Orru.PlugAttack.Storage ) [ { { :throttle , { 127 , 0 , 0 , 1 } , 27391530 } , 1 , 1643491860000 } ]`
PlugAttack stores details about requests that match the rules you define. Now send 100 login requests with envy :
`envy % mix run do_ato.exs credentials_100.txt 500
...`
Then check ETS:
`iex(8)> :ets . tab2list ( Orru.PlugAttack.Storage ) [ { { :throttle , { 127 , 0 , 0 , 1 } , 27391533 } , 101 , 1643492040000 } ]`
This is how PlugAttack keeps track of requests that match the rule you defined. Your output may be different if the 60 second period ended while the requests were running.
7. Multiple rules and blocking IP addresses
Now that you have completed a basic example of throttling login requests, consider a more complex requirement.
`1. Limit login requests from one IP address to 10 per minute
2. If one IP does 50 login requests in a minute, ban it for seven days (one week)`
Your first idea may be to add the following to plug_attack.ex , after the “throttle login requests” rule:
`# This is wrong rule "block login requests if over 50 in 60 seconds" , conn do if conn . method == "POST" and conn . path_info == [ "users" , "log_in" ] do fail2ban conn . remote_ip , period : 60_000 , limit : 50 , ban_for : 60_000 * 60 * 24 * 7 , storage : { PlugAttack.Storage.Ets , Orru.PlugAttack.Storage } end end`
To demonstrate why this rule is wrong, you may add it in plug_attack.ex , then run orru and send 100 login requests with:
`envy % mix run do_ato.exs credentials_100.txt 500`
Check ETS:
`iex(2)> :ets . tab2list ( Orru.PlugAttack.Storage ) [ { { :throttle , { 127 , 0 , 0 , 1 } , 27391548 } , 27 , 1643492940000 } , { { :throttle , { 127 , 0 , 0 , 1 } , 27391547 } , 73 , 1643492880000 } ]`
The reason for 27 and 73 is because the script was running as the clock changed minutes. This demonstrates the fail2ban rule was never matched, only the throttle rule. If you move the fail2ban rule above the throttle rule, only fail2ban will match, meaning an attacker can send 49 requests per minute without being throttled.
A new plug for the fail2ban rule will fix this problem. Create orru/lib/orru/plug_attack_fail2ban.ex and enter:
`defmodule Orru.PlugAttackFail2Ban do use PlugAttack @week 60_000 * 60 * 24 * 7 rule "fail2ban on login" , conn do if conn . method == "POST" and conn . path_info == [ "users" , "log_in" ] do fail2ban conn . remote_ip , period : 60_000 , limit : 50 , ban_for : @week , storage : { PlugAttack.Storage.Ets , Orru.PlugAttack.Storage } end end end`
Now we need to add the PlugAttackFail2Ban plug to our router. The order here is important. Remember we want to have two rules in place - only allow 10 login requests per minute and if one IP does 50 requests in a minute, ban for a week. Let’s consider the wrong order first:
`pipeline :plug_attack do # This order is wrong plug Orru.PlugAttack plug Orru.PlugAttackFail2Ban end`
The problem is that after 10 requests in a 60 second period, the conn of all future requests will be marked as throttled, and not count toward the fail2ban rule. The client will be throttled, but never banned for a week.
With orru running, and the plug order wrong, do:
`envy % mix run do_ato.exs credentials_100.txt 500`
Then check ETS:
`iex(5)> :ets . tab2list ( Orru.PlugAttack.Storage ) [ { { { :fail2ban , { 127 , 0 , 0 , 1 } } , 1643495107200 } , 0 , 1643495167200 } , { { { :fail2ban , { 127 , 0 , 0 , 1 } } , 1643495107325 } , 0 , 1643495167325 } , { { { :fail2ban , { 127 , 0 , 0 , 1 } } , 1643495106755 } , 0 , 1643495166755 } , { { { :fail2ban , { 127 , 0 , 0 , 1 } } , 1643495106838 } , 0 , 1643495166838 } , { { :throttle , { 127 , 0 , 0 , 1 } , 27391585 } , 100 , 1643495160000 } , { { { :fail2ban , { 127 , 0 , 0 , 1 } } , 1643495106735 } , 0 , 1643495166735 } , { { { :fail2ban , { 127 , 0 , 0 , 1 } } , 1643495107081 } , 0 , 1643495167081 } , { { { :fail2ban , { 127 , 0 , 0 , 1 } } , 1643495107696 } , 0 , 1643495167696 } , { { { :fail2ban , { 127 , 0 , 0 , 1 } } , 1643495107446 } , 0 , 1643495167446 } , { { { :fail2ban , { 127 , 0 , 0 , 1 } } , 1643495107569 } , 0 , 1643495167569 } , { { { :fail2ban , { 127 , 0 , 0 , 1 } } , 1643495106967 } , 0 , 1643495166967 } ]`
10 requests matched :fail2ban, then 100 matched :throttle.
Change orru/lib/orru_web/router.ex so the plugs are in the correct order:
`# Correct order
pipeline :plug_attack do
  plug Orru.PlugAttackFail2Ban
  plug Orru.PlugAttack
end`
Then send 100 login requests:
`envy % mix run do_ato.exs credentials_100.txt 500`
Check ETS:
`iex(4)> :ets . tab2list ( Orru.PlugAttack.Storage ) [ { { { :fail2ban , { 127 , 0 , 0 , 1 } } , 1643495266511 } , 0 , 1643495326511 } , ... { { :fail2ban_banned , { 127 , 0 , 0 , 1 } } , true , 1644100066630 } , { { :throttle , { 127 , 0 , 0 , 1 } , 27391587 } , 50 , 1643495280000 } , ... ]`
This fulfills our original requirements:
`1. Limit login requests from one IP address to 10 per minute
2. If one IP does 50 login requests in a minute, ban it for seven days (one week)`
Careful readers of PlugAttack’s documentation may have noticed we used the same storage for both our rules. The documentation says, “Be careful not to use the same key for different rules that use the same storage”.
To demonstrate how reuse of storage can cause problems, let’s add another throttle rule in orru/lib/orru/plug_attack.ex
`defmodule Orru.PlugAttack do use PlugAttack rule "throttle login requests" , conn do if conn . method == "POST" and conn . path_info == [ "users" , "log_in" ] do throttle conn . remote_ip , period : 60_000 , limit : 10 , storage : { PlugAttack.Storage.Ets , Orru.PlugAttack.Storage } end end # Should not be using this storage rule "throttle register page GETs" , conn do if conn . method == "GET" and conn . path_info == [ "users" , "register" ] do throttle conn . remote_ip , period : 60_000 , limit : 20 , storage : { PlugAttack.Storage.Ets , Orru.PlugAttack.Storage } end end end`
In your web browser, go to http://localhost:4000/users/register , then refresh the page 9 times. Then attempt to login. Your attempt will fail, because any throttle rule for conn.remote_ip will increment the same :throttle tuple in ETS.
`iex(8)> :ets . tab2list ( Orru.PlugAttack.Storage ) [ { { :throttle , { 127 , 0 , 0 , 1 } , 27391617 } , 11 , 1643497080000 } ]`
When PlugAttack checks Orru.PlugAttack.Storage, :throttle has been incremented to 11, so any throttle rule for the key conn.remote_ip will have count. Defining an additional storage in application.ex will allow you to avoid this problem.
8. Conclusion and Future Work
This article does not cover deployment of a Phoenix application. One important note for anyone using PlugAttack is that conn.remote_ip will likely not reflect the real client IP. Use the remote_ip library to fix this.
ETS is reset when you deploy your application, so the seven day ban example from this article may not work if you do frequent deploys. Writing login history to Postgres, then using that data to make throttling decisions may be a better solution. You may also wish to throttle on failed login requests only, instead of on all logins.
PlugAttack supports callbacks that are triggered when a request is allowed or blocked. This is a powerful feature, for example if you want to record statistics about how many requests are being blocked, block_action/3 could be used to trigger writes to the database.
Thank you to Michał Muskała for creating PlugAttack.
Paraxial.io stops data breaches by helping developers ship secure applications. Get a demo or start for free. Subscribe to stay up to date on new posts. Thank You Oops! Something went wrong, please try again
This guide collects some of the most common functions of the Elixir Programming Language and explain them conceptual and graphically in a simple way.
To request new entries, suggest corrections or provide translations go to the this project’s repository in Github .
Atom
Enum
- all?/2
- any?/2
- at/3
- chunk_by/2
- chunk_every/2
- chunk_every/4
- chunk_while/4
- concat/1
- concat/2
- count/1
- count/2
- dedup/1
- dedup_by/2
- drop/2
- drop_every/2
- drop_while/2
- each/2
- empty?/1
- fetch!/2
- fetch/2
- filter/2
- find/3
- find_index/2
- find_value/3
- flat_map/2
- flat_map_reduce/3
- frequencies/1
- frequencies_by/2
- group_by/3
- intersperse/2
- join/2
- map/2
- map_every/3
- map_intersperse/3
- map_join/3
- map_reduce/3
- max/3
- max_by/4
- member?/2
- min/3
- min_by/4
- min_max/2
- min_max_by/3
- random/1
- reduce/2
- reduce/3
- reduce_while/3
- reject/2
- reverse/1
- reverse/2
- reverse_slice/3
- scan/2
- scan/3
- shuffle/1
- slice/2
- slice/3
- sort/1
- sort/2
- sort_by/3
- split/2
- split_while/2
- split_with/2
- sum/1
- take/2
- take_every/2
- take_random/2
- take_while/2
- uniq/1
- uniq_by/2
- unzip/1
- with_index/2
- zip/1
- zip/2
Integer
Kernel
Keyword
- delete/2
- delete_first/2
- drop/2
- fetch!/2
- fetch/2
- get/3
- get_lazy/3
- get_values/2
- has_key?/2
- keys/1
- keyword?/1
- new/0
- new/1
- new/2
- pop!/2
- pop/3
- pop_first/3
- pop_lazy/3
- pop_values/2
- put/3
- put_new/3
- put_new_lazy/3
- replace!/3
- split/2
- take/2
- to_list/1
- update!/3
- update/4
- values/1
List
- delete/2
- delete_at/2
- duplicate/2
- first/1
- flatten/1
- flatten/2
- foldl/3
- foldr/3
- insert_at/3
- keydelete/3
- keyfind/4
- keymember?/3
- keyreplace/4
- keystore/4
- keytake/3
- last/1
- pop_at/3
- replace_at/3
- starts_with?/2
- to_integer/1
- to_integer/2
- to_tuple/1
- update_at/3
- wrap/1
- zip/1
Map
- delete/2
- drop/2
- fetch!/2
- fetch/2
- get/3
- get_and_update!/3
- get_and_update/3
- get_lazy/3
- has_key?/2
- keys/1
- merge/2
- merge/3
- new/0
- new/1
- new/2
- pop!/2
- pop/3
- pop_lazy/3
- put/3
- put_new/3
- put_new_lazy/3
- replace!/3
- split/2
- take/2
- to_list/1
- update!/3
- update/4
- values/1
Range
Stream
- chunk_by/2
- chunk_every/2
- chunk_every/4
- chunk_while/4
- cycle/1
- dedup/1
- dedup_by/2
- drop/2
- drop_every/2
- drop_while/2
- each/2
- filter/2
- flat_map/2
- intersperse/2
- interval/1
- iterate/2
- map/2
- map_every/3
- reject/2
- repeatedly/1
- scan/2
- scan/3
- take/2
- take_every/2
- take_while/2
- timer/1
- transform/3
- transform/4
- unfold/2
- uniq/1
- uniq_by/2
- with_index/2
- zip/1
- zip/2
Tuple
Building a World of Warcraft server in Elixir
Updates:
Thistle Tea is my new World of Warcraft private server project. You can log in, create a character, run around, and cast spells to kill mobs, with everything synchronized between players as expected for an MMO. It was floating around in my head to build this for a while, since I have an incurable nostalgia for early WoW. I first mentioned this on May 13th and didn’t expect to get any further than login, character creation, and spawning into the map. Here’s a recount of the first month of development.
Prep Work
Before coding, I did some research and came up a plan.
- Code this in Elixir, using the actor model.
- MaNGOS has done the hard work on collecting all the data, so use it.
- Use Thousand Island as the socket server.
- Treat this project as an excuse to learn more Elixir.
- Reference existing projects and documentation rather than working from scratch.
- Speed along the happy path rather than try and handle every error.
Day 1 - June 2nd
There are two main parts to a World of Warcraft server: the authentication server and the game server. Up first was authentication, since you can’t do anything without logging in.
To learn more about the requests and responses, I built a quick MITM proxy between the client and a MaNGOS server to log all packets. It wasn’t as useful as expected, since not much was consistent, but it did help me internalize how the requests and responses worked.
The first byte of an authentication packet is the opcode, which indicates which message it is, and the rest is a payload with the relevant data. I was able to extract the fields from the payload by pattern matching on the binary data.
The auth flow can be simplified as:
- Client sends a CMD_AUTH_LOGON_CHALLENGE packet
- Server sends back some data for the client to use in crypto calculations
- Client sends a CMD_AUTH_LOGON_PROOF packet with the client proof
- If the client proof matches what’s expected, server sends over the server_proof
- Client is now authenticated
It uses SRP6, which I hadn’t heard of before this. Seems like the idea is to avoid transmitting an unencrypted password and instead both the client and server independently calculate a proof that only matches if they both know the correct password. If the proof matches, then authentication is successful.
So basically, what I needed to do was:
- Listen for data over the socket
- Once data received, parse what message it is out of the header section
- Handle each one differently
- Send back the appropriate packet
This whole part is well documented, but I still ran into some issues with the cryptography. Luckily, I found a blog post and an accompanying Elixir implementation, so I was able to substitute my broken cryptography with working cryptography. Without that, I would’ve been stuck at this part for a very long time (maybe forever). Wasn’t able to get login working on day 1, but I was close.
Links:
- https://wowdev.wiki/Login
- http://srp.stanford.edu/design.html
- https://shadowburn-project.org/2018/10/17/logging-in-with-vanilla.html
- https://gitlab.com/shadowburn/shadowburn
- https://hexdocs.pm/elixir/main/binaries-strings-and-charlists.html
Day 2 - June 3rd
I spent some time cleaning up the code and found a logic error where I reversed some crypto bytes that weren’t supposed to be. Fixing that made auth work, finally getting a success with hardcoded credentials.

Next up was getting the realm list to work, by handling CMD_REALM_LIST and returning which game server to connect to.

This got me out of the tedious auth bits and I could get to building the game server.
Links:
Day 3 - June 4th
The goal for today was to get spawned into the world. But first more tedious auth bits.
The game server auth flow can be simplified as:
- When client first connects, server sends SMSG_AUTH_CHALLENGE, with a random seed
- Client sends back CMSG_AUTH_SESSION, with another client proof
- If client proof matches server proof, server sends a successful SMSG_AUTH_RESPONSE
This negotaties how to encrypt/decrypt future packet headers. Luckily Shadowburn also had crypto code for this, so I was able to use it here. The server proof requires a value previously calculated by the authentication server, so I used an Agent to store that session value. It worked, but I later refactored it to use ETS for a simpler interface.
After that, it’s something like:
- Client sends message to server
- Server decrypts header, which contains message size (2 bytes) and opcode (4 bytes)
- Server handles message and sends back 0 or more messages to client
First was handling CMSG_CHAR_CREATE and CMSG_CHAR_ENUM, so I could create and list characters. I originally used an Agent for storage here as well, which made things quick to prototype.

Then I got side-tracked for a bit trying to get equipment to show up, since I had all the equipment display ids hardcoded to 0. I looked through the MaNGOS database and hardcoded a few proper display ids before moving on.

After that was handling CMSG_PLAYER_LOGIN. I found an example minimal SMSG_UPDATE_OBJECT spawn packet, which was supposed to spawn me in Northshire Abbey.
That’s probably the most important packet, since it does everything from:
- Spawning things into the world, like players, mobs, objects, etc.
- Updating their values, like health, position, level, etc.
It has a lot of different forms, can batch multiple object updates into a single packet, and has a compressed variant.

Whoops, had the coordinates a bit off.
After fixing that, I was in the human starting area as expected. No player model yet, though.

I thought movement was broken, but it turns out all keybinds were being unset on every login, so the movement keys just weren’t bound. Manually navigating to the keybinding configuration and resetting them to default allowed me to move around.
Next up was adding more to that spawn packet to use the player race and proper starting area. The starting areas were grabbed from a MaNGOS database that I converted over to SQLite and wired up with Ecto.

Last for the night was to get logout working.
The implementation was something like:
- After receiving a CMSG_LOGOUT_REQUEST, use
Process.send_after/3to queue a :login_complete message that would send SMSG_LOGOUT_COMPLETE to the client in 20 seconds - Store a reference to that timer in state
- If received a CMSG_LOGOUT_CANCEL, cancel the timer and remove it from state
This was the first piece that really took advantage of Elixir’s message passing.
The white chat box was weird, but it was nice being able to log in.
Links:
- https://wowdev.wiki/Opcodes
- https://wowdev.wiki/SMSG_UPDATE_OBJECT
- https://gtker.com/wow_messages/docs/smsg_update_object.html
- https://gtker.com/wow_messages/ir/implementing_world.html
- https://github.com/vdechef/mysql2sqlite
Day 4 - June 5th
First up was reorganizing the code, since my game.ex GenServer was getting too large.
My strategy for that was:
- Split out related messages into separate files
- auth.ex, character.ex, ping.ex, etc.
- wrapped in the
__using__macro
- Include those back into game.ex with
use
It worked, but it messed with line numbers in error messages and made things harder to debug.
After that, I wanted to generate that spawn packet properly rather than hardcoding. The largest piece of this was figuring out the update mask for the update fields.
There are a ton of fields for the different types of objects SMSG_UPDATE_OBJECT handles. Before the raw object fields in the payload, there’s a bit mask with bits set at offsets that correspond to the fields being sent. Without that, the client wouldn’t know what to do with the values.
So, I needed to write a function that would generate this bit mask from the fields I pass in. Luckily it’s all well documented, but it still took a while to get to a working implementation.
Links:
- https://gtker.com/wow_messages/types/update-mask.html
- https://gtker.com/wow_messages/docs/object.html
Day 5 - June 6th
Referencing MaNGOS, I added some more messages that the server sends to the client after a CMSG_PLAYER_LOGIN. One of these, SMSG_ACCOUNT_DATA_TIMES, fixed the white chat box and keybinds being reset.
I also added SMSG_COMPRESSED_UPDATE_OBJECT, which compresses the SMSG_UPDATE_OBJECT packet with :zlib.compress/1.
This was more straightforward than expected, and I made things use the compressed variant if it’s actually smaller.
I’m expecting this to have even more benefits when I get to batching object updates, but right now I’m only updating objects one by one.
Movement would come up soon, so I started adding the handlers for those packets.
Day 6 - June 7th
In the update packet, I still had the object guid hardcoded. This is because it wants a packed guid and I needed to write some functions to handle that. Rather than the entire guid, a packed guid is a byte mask followed by all non-zero bytes. The byte mask has bits set that correspond to where the following bytes go in the unpacked guid. This is for optimizing packet size, since a guid is always 8 bytes but a packed guid can be as small as 2 bytes.
This took a while, because the client was crashing when I changed the packed guid from <<1, 4>> to anything else.
After trying different things and wasting a lot of time, I realized that the guid was in two places in the packet and they needed to match.
A quick fix later and things were working as expected.
Links:
Day 7 - June 8th
It was about time to start implementing the actual MMO features, starting with seeing other players. To test, I hardcoded another update packet after the player’s with a different guid, to try and spawn something other than the player.

Then I used a Registry to keep track of logged in players and their spawn packets.
After entering the world, I would use Registry.dispatch/3 to:
- spawn all logged in players for that player
- spawn that player for all other players
- both using SMSG_UPDATE_OBJECT
After that, I added a similar dispatch when handling movement packets to broadcast movement to all other players. This is where the choice of Elixir really started to shine, and I quickly had players able to see each other move around the screen.

I tested this approach with multiple windows open and it was very cool to see everything synchronized.

I added a handler for CMSG_NAME_QUERY to get names to stop showing up as Unknown and also despawned players with SMSG_DESTROY_OBJECT when logging out.
This is where I started noticing a bug: occasionally I wouldn’t be able to decrypt a packet successfully, which would lead to all future attempts for that connection failing too, since there’s a counter as part of the decryption function. I couldn’t figure out how to resolve it yet, though, or reliably reproduce.
Links:
- https://gtker.com/wow_messages/docs/movementinfo.html
- https://gtker.com/wow_messages/docs/msg_move_start_forward_client.html
- https://gtker.com/wow_messages/docs/msg_move_start_backward_server.html
- https://gtker.com/wow_messages/docs/cmsg_name_query.html
- https://gtker.com/wow_messages/docs/smsg_name_query_response.html
- https://gtker.com/wow_messages/docs/smsg_destroy_object.html
Day 8 - June 9th
To get chat working, I handled CMSG_MESSAGECHAT and broadcasted SMSG_MESSAGECHAT to players, using Registry.dispatch/3 here too.
I only focused on /say here and it’s all players rather than nearby.
Something to fix later.

Related to that weird decryption bug, I handled the case where the server received more than one packet at once. This might’ve helped a bit, but didn’t completely resolve the issue.
Links:
- https://gtker.com/wow_messages/docs/cmsg_messagechat.html
- https://gtker.com/wow_messages/docs/smsg_messagechat.html
Day 9 - June 10th
I still had authentication with a hardcoded username, password, and salt, so it was about time to fix that. Rather than go with PostgreSQL or SQLite for the database, I decided to go with Mnesia, since one of my goals was to learn more about Elixir and its ecosystem. I briefly tried plain :mnesia, but decided to use Memento for a cleaner interface.
So, I added models for Account and Character and refactored everything to use them. The character object is kept in process state and only persisted to the database on logout or disconnect. Saving on a CMSG_PING or just periodically could be a good idea too, eventually. Right now data isn’t persisted to disk, since I’m still iterating on the data model, but that should be straightforward to toggle later.
Links:
- https://www.erlang.org/doc/apps/mnesia/mnesia.html
- https://elixirschool.com/en/lessons/storage/mnesia
- https://github.com/sheharyarn/memento
Day 10 - June 11th
Today was standardizing the logging, handling a bit more of chat, and handling an unencrypted CMSG_PING. I was thinking that could be part of the intermittent decryption issues too, but looking back I don’t think I’ve ever had my client send that unencrypted anyways.
Day 11 - June 12th
I wanted equipment working so players weren’t naked all the time, so I started on that. Using the MaNGOS item_template table, I wired things up to set random equipment on character creation. Then I added that to the response to CMSG_CHAR_ENUM so they would show up in the login screen.

Up next was getting it showing in game.
Day 12 - June 13th
It took a bit to figure out the proper offsets for each piece of equipment in the update mask, but I eventually got it working.

Since equipment is part of the update object packet, it just worked for other players, which was nice.

Day 13 - June 14th
I had player movement synchronizing between players properly so I wanted to get sitting working too.

Whoops. Weird things happen when field offsets or sizes are incorrect when building that update mask.

After that, I wanted to play around a bit by randomizing equipment on every jump. Here I learned that you need to send all fields in the update object packet, like health, or they get reset. I was trying to just send the equipment changes but I’d die on every jump.

After making sure to send all fields, it was working as expected.
Day 14 - June 15th
Took a break.
Day 15 - June 16th
Today was refactoring and improvements.
I reworked things into proper modules, since it was getting hard to debug when all the line numbers were wrong.
Now game.ex called the appropriate module’s handle_packet/3 function, rather than combining everything with use.
I also reworked things so players were spawned with their current position instead of the initial position saved in the registry. This included some changes to make building an update packet more straightforward.
Day 16 - June 17th
Today was just playing around and no code changes.

Not sure why the model is messed up here, but it seems like it’s something with my computer rather than anything server related.
Day 17 - June 18th
The world was feeling a bit empty, so I wanted to spawn in mobs. First was hardcoding an update packet that should spawn a mob and having it trigger on /say.

After that, I used the creature table of the MaNGOS database to get proper mobs spawning. I used a GenServer for this so every mob would be a process and keep track of their own state. Communication between mobs and players would happen through message passing. First I hardcoded a few select ids in the starting area to load, and after that worked I loaded them all.
Rather than spawn all ~57k mobs for the player, I wired things up to only spawn mobs within a certain range. This looked like:
- Store mob pids in a Registry, along with their x, y, z position
- Create a
within_range/2function that takes in two x, y, z tuples - On player login, dispatch on that MobRegistry, using
within_range/2to only build spawn packets for mobs within range - On player movement, do the same
It worked really well and I could run around and see the mobs.

Next up was optimization and despawning mobs that were now out of range.
Day 18 - June 19th
For optimization, I didn’t want to send duplicate spawn packets for mobs that were already spawned. I also wanted to despawn mobs that were out of range. To do this, I used ETS to track which guids were spawned for a player.
In the dispatch, the logic was:
- if in_range and not spawned, spawn
- if not in_range and spawned, despawn
- otherwise, ignore
Despawning was done through the same SMSG_DESTROY_OBJECT packet used for despawning a player after logging out.
After getting that working, I ran around the world and explored for a bit.

I noticed something wrong when exploring Westfall. Bugs were spawning in the air and then falling down to the ground. Turns out I wasn’t separating mobs by map, so Westfall had mobs from Silithus mixed in. To fix, I reworked both the mob and player registries to use the map as the key.

Having mobs standing in place was a bit boring and I wanted them to move around. Turns out this is pretty complicated and I’ll actually have to use the map files to generate paths that don’t float or clip through the ground. There are a few projects for this, all a bit difficult to include in an Elixir project. I’m thinking RPC could work, but not sure if it’ll be performant enough yet.
The standard update object packet can be used for mob movement here, since it has a movement block, but there might be some more specialized packets to look into later too.
Without using the map data, I couldn’t get the server movement to line up with what happened in the client. So, I settled with getting mobs to spin at random speeds.
That was a bit silly and used a lot of CPU, so I tweaked it to just randomly change orientation instead.
Links:
- https://gtker.com/wow_messages/docs/movementblock.html
- https://gtker.com/wow_messages/docs/compressedmove.html
- https://github.com/namreeb/namigator
Day 19 - June 20th
Here I got mob names working by implementing CMSG_CREATURE_QUERY. This crashed the client when querying mobs that didn’t have a model, so I removed them from being loaded. I also started loading in mob movement data and optimized the query a bit to speed up startup.

I finally got some people to help me test the networking later that day. It didn’t start very well.

Turns out I hadn’t tested this locally since adding mobs and the player/mob spawn/despawns were conflicting with each other due to guid collisions. Players were being constantly spawned in and out.

I did some emergency patching to make it so players are never despawned, even out of range. I also turned off /say spawning boars since that was getting annoying. That worked for now.

There were still some major issues. My helper had 450 ms latency and would crash when running to areas with a lot of mobs. I couldn’t reproduce, though, with my 60 ms latency.
Links:
- https://gtker.com/wow_messages/docs/cmsg_creature_query.html
- https://gtker.com/wow_messages/docs/smsg_creature_query_response.html
Day 20 - June 21
To reproduce the issue from the previous night, I connected to my local server from my laptop on the same network.
On my laptop, I used tc to simulate a ton of latency and wired things up so equipment would change on any movement instead of just jump.
This sent a lot of packets when spinning and I was finally able to reproduce.

Turns out the crashing issues were from not receiving a complete packet, but still trying to decrypt and handle it. I was handling if the server got more than one packet, but not if the server got a partial packet.
Referencing Shadowburn’s implementation, the fix for this was to let the packet data accumulate until there’s enough to handle. This finally resolved the weird decryption issue I ran into on day 7.
For the guid collision issue, I added a large offset to creature guids so they won’t conflict with player guids.
Day 21 - June 22
Took a break.
Day 22 - June 23
Worked on CMSG_ITEM_NAME_QUERY a bit, but there’s still something wrong here. It could be that it’s trying to calculate damage using some values I’m not passing to the client yet.

Decided spells would be next, so I started on that. First was sending spells over with SMSG_INITIAL_SPELLS on login, using the initial spells in MaNGOS, so I’d have something in the spellbook. Everything was instant cast though, for some reason.

Turns out I needed to set unit_mod_cast_speed in the player update packet for cast times to show up properly in the client.

I started by handling CMSG_CAST_SPELL, which would send a successful SMSG_CAST_RESULT after the spell cast time, so other spells could be cast. I also handled CMSG_CANCEL_CAST, to cancel that timer. This implementation looked a bit like the logout logic.
The starting animation for casting a spell would play, but no cast bar or anything further.
Links:
- https://gtker.com/wow_messages/docs/smsg_initial_spells.html
- https://gtker.com/wow_messages/docs/cmsg_cast_spell.html
- https://gtker.com/wow_messages/docs/cmsg_cancel_cast.html
- https://gtker.com/wow_messages/docs/smsg_cast_result.html
Days 23 to 26 - June 24 to 27
Took a longer break.
Day 27 - June 28
I was able to get a cast bar showing up by sending SMSG_SPELL_START after receiving the cast spell packet.

The projectile effect took a bit longer to figure out. I needed to send a SMSG_SPELL_GO after the cast was complete, with the proper target guids.

Links:
- https://gtker.com/wow_messages/docs/smsg_spell_start.html
- https://gtker.com/wow_messages/docs/smsg_spell_go.html
Day 28 - June 29
I got self-cast spells working by setting the target guid to the player’s guid.

Day 29 - June 30
Another break.
Day 30 - July 1
Since I had spells somewhat working, next I had to clean up the implementation. I dispatched the SMSG_SPELL_START and SMSG_SPELL_GO packets to nearby players and fixed spell cancelling.

Day 31 - July 2
I added levels to mobs, random from their minimum to maximum level, previously hardcoded 1. Then I made spells do some hardcoded damage, so mobs could die. Mobs would still randomly change orientation when dead, so added a check to only move if alive.

That seemed like a good stopping point and was one month since I started writing code for the project.
Future Plans
I’ll slowly work on this, adding more functionality as I go. My goal isn’t a 1:1 Vanilla server, but more something that fits well with Elixir’s capabilities, so I don’t plan on accepting limitations for the sake of accuracy or similar. I’d like to see how many players this approach can handle and how it compares in performance to other implementations eventually too.
Some things on the list:
- proper mob + player stats
- proper damage calculations
- pvp
- quests
- mob movement + combat ai
- loot + inventory management
- more spells + effects
- tons of refactoring
- benchmarking
- gameplay loop, in general
So still plenty more work to do. :)
Thanks to all the projects I’ve referenced for this, most of which I’ve tried to link here.
I wouldn’t have gotten very far without them and their awesome documentation.
Comments
VS Code or Cursor Broken for Elixir and possible fixes
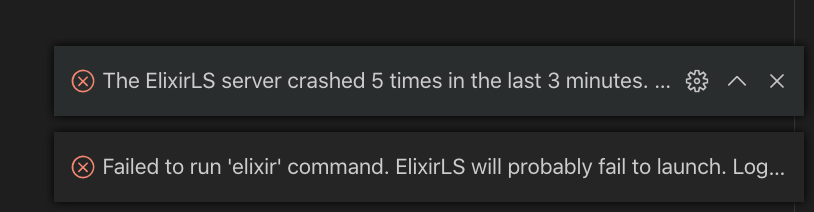
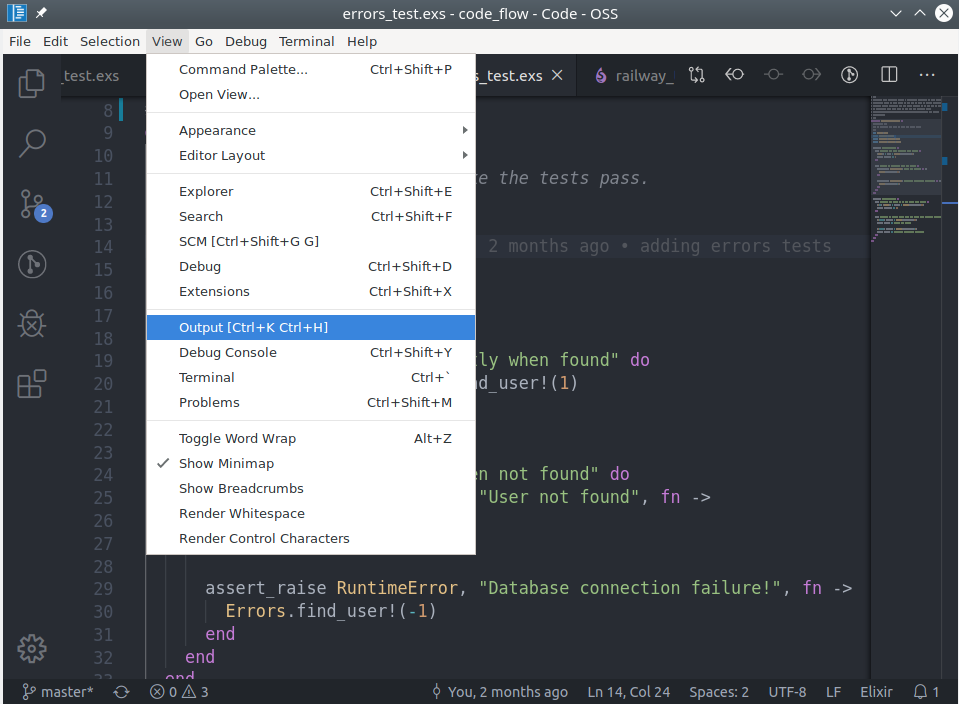
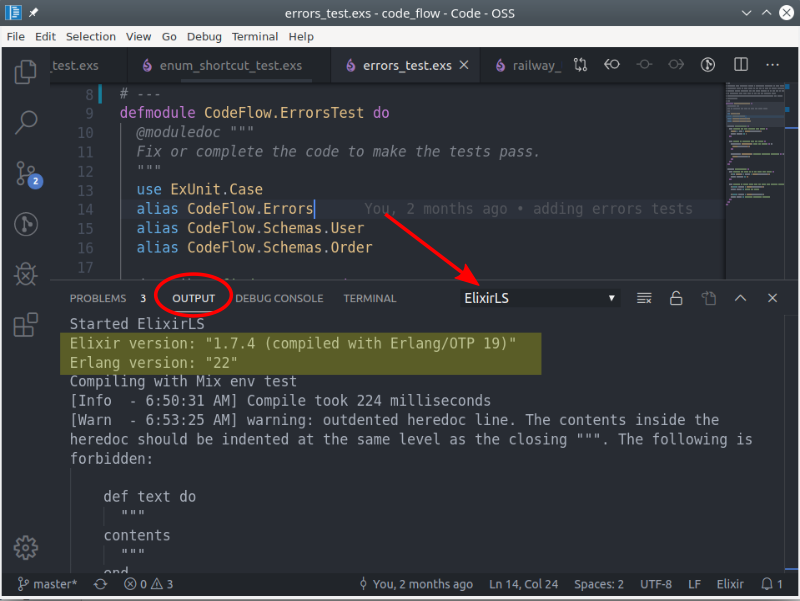
Additionally, be aware that when you change your version or Elixir or Erlang it will need to rebuild the full PLT. So you will encounter this process again.
/Users/dood/.vscode/extensions/jakebecker.elixir-ls-0.2.25/elixir-ls-release/language_server.sh: line 18: elixir: command not found
[Info  - 1:13:04 PM] Connection to server got closed. Server will restart.
/Users/dood/.vscode/extensions/jakebecker.elixir-ls-0.2.25/elixir-ls-release/language_server.sh: line 18: elixir: command not found
[Info  - 1:13:04 PM] Connection to server got closed. Server will restart.
/Users/dood/.vscode/extensions/jakebecker.elixir-ls-0.2.25/elixir-ls-release/language_server.sh: line 18: elixir: command not found
[Info  - 1:13:04 PM] Connection to server got closed. Server will restart.
/Users/dood/.vscode/extensions/jakebecker.elixir-ls-0.2.25/elixir-ls-release/language_server.sh: line 18: elixir: command not found
[Info  - 1:13:04 PM] Connection to server got closed. Server will restart.
/Users/dood/.vscode/extensions/jakebecker.elixir-ls-0.2.25/elixir-ls-release/language_server.sh: line 18: elixir: command not found
[Error - 1:13:04 PM] Connection to server got closed. Server will not be restarted.
asdf reshim elixir <your-version>
Erlang not installed
asdf: No version set for command erl you might want to add one of the following in your .tool-versions file:erlang 21.0.7 erlang 21.1.3 erlang 22.0.7 erlang 19.3.6.9 erlang 22.1.7 [Info - 6:08:00 AM] Connection to server got closed. Server will restart.
Version Mismatch
Started ElixirLS
Elixir version: “1.7.4 (compiled with Erlang/OTP 19)”
Erlang version: “22”
Compiling with Mix env test
[Info  - 7:41:33 AM] Compile took 224 milliseconds
…
Elixir umbrella projects
How did you launch VS Code?
code .
This opens the current directory in VS Code. This helps isolate environment issues. If it works when launching VS Code from the terminal, consider always doing it that way or look into fixing your environment setup.
ElixirLS stopped working
What happened?
mix do clean, compile

- https://github.com/srcrip/live_toast A beautiful drop-in replacement for the Phoenix Flash system.
- https://github.com/sezaru/flashy Flashy is a small library that extends LiveView's flash support to function and live components.
UI
- https://surface-ui.org/ - git - A server-side rendering component library for Phoenix Framework
mix cmd --app child_app_name mix test --color
Specific file/line
mix cmd --app child_app_name mix test test/child_app_name_nice_test.exs:69 --color
We can also define a Mix task to make our life easier!
def aliases do
  [
    child_test: "cmd --app child_app_name mix test --color"
  ]
end
Then you call
mix child_test
mix child_test test/child_app_name_nice_test.exs:69
- Passwords obtained from previous breaches
- Context-specific words, such as the name of the service, the username, and derivatives thereof
- Repetitive or sequential characters
- Dictionary words
Passwords obtained from previous breaches
def deps do
  [
    ...
    {:ex_pwned, "~> 0.1.0"}
  ]
end
defmodule MyApp.Users.User do use Ecto.Schema use Pow.Ecto.Schema# …
def changeset(user_or_changeset, attrs) do user_or_changeset |> pow_changeset(attrs) |> validate_password_breach() end
defp validate_password_breach(changeset) do Ecto.Changeset.validate_change(changeset, :password, fn :password, password -> case password_breached?(password) do true -> [password: “has appeared in a previous breach”] false -> [] end end) end
defp password_breached?(password) do case Mix.env() do :test -> false _any -> ExPwned.password_breached?(password) end end end
Context-specific words, such as the name of the service, the username, and derivatives thereof
defmodule MyApp.Users.User do use Ecto.Schema use Pow.Ecto.Schema# …
def changeset(user_or_changeset, attrs) do user_or_changeset |> pow_changeset(attrs) |> validate_password_no_context() end
@app_name “My Demo App”
defp validate_password_no_context(changeset) do Ecto.Changeset.validate_change(changeset, :password, fn :password, password -> [ @app_name, String.downcase(@app_name), Ecto.Changeset.get_field(changeset, :email), Ecto.Changeset.get_field(changeset, :username) ] |> Enum.reject(&is_nil/1) |> similar_to_context?(password) |> case do true -> [password: “is too similar to username, email or #{@app_name}”] false -> [] end end) end
def similar_to_context?(contexts, password) do Enum.any?(contexts, &String.jaro_distance(&1, password) > 0.85) end end
Repetitive or sequential characters
defmodule MyApp.Users.User do use Ecto.Schema use Pow.Ecto.Schema# …
def changeset(user_or_changeset, attrs) do user_or_changeset |> pow_changeset(attrs) |> validate_password() end
defp validate_password(changeset) do changeset |> validate_no_repetitive_characters() |> validate_no_sequential_characters() end
defp validate_no_repetitive_characters(changeset) do Ecto.Changeset.validate_change(changeset, :password, fn :password, password -> case repetitive_characters?(password) do true -> [password: “has repetitive characters”] false -> [] end end) end
defp repetitive_characters?(password) when is_binary(password) do password |> String.to_charlist() |> repetitive_characters?() end defp repetitive_characters?([c, c, c | _rest]), do: true defp repetitive_characters?([_c | rest]), do: repetitive_characters?(rest) defp repetitive_characters?([]), do: false
defp validate_no_sequential_characters(changeset) do Ecto.Changeset.validate_change(changeset, :password, fn :password, password -> case sequential_characters?(password) do true -> [password: “has sequential characters”] false -> [] end end) end
@sequences [“01234567890”, “abcdefghijklmnopqrstuvwxyz”] @max_sequential_chars 3
defp sequential_characters?(password) do Enum.any?(@sequences, &sequential_characters?(password, &1)) end
defp sequential_characters?(password, sequence) do max = String.length(sequence) - 1 - @max_sequential_chars
end end
Dictionary words
defmodule MyApp.Users.User do use Ecto.Schema use Pow.Ecto.Schema# …
def changeset(user_or_changeset, attrs) do user_or_changeset |> pow_changeset(attrs) |> validate_password_dictionary() end
defp validate_password_dictionary(changeset) do Ecto.Changeset.validate_change(changeset, :password, fn :password, password -> password |> String.downcase() |> password_in_dictionary?() |> case do true -> [password: “is too common”] false -> [] end end) end
:my_app |> :code.priv_dir() |> Path.join(“dictionary.txt”) |> File.stream!() |> Stream.map(&String.trim/1) |> Stream.each(fn password -> defp password_in_dictionary?(unquote(password)), do: true end) |> Stream.run()
defp password_in_dictionary?(_password), do: false end
Require users to change weak password upon sign in
def check_password(conn, _opts) do
changeset = MyApp.Users.User.changeset(%MyApp.Users.User{}, conn.params[“user”])
case changeset.errors[:password] do
nil ->
conn
error <strong>-></strong>
msg <strong>=</strong> MyAppWeb<strong>.</strong>ErrorHelpers<strong>.</strong>translate_error(error)
conn
<strong>|></strong> put_flash(:error, "You have to reset your password because it #{msg}")
<strong>|></strong> redirect(to: Routes<strong>.</strong>pow_reset_password_reset_password_path(conn, :new))
<strong>|></strong> Plug<strong>.</strong>Conn<strong>.</strong>halt()
end
end
Conclusion
Unit tests
defmodule MyApp.Users.UserTest do use MyApp.DataCasealias MyApp.Users.User
test “changeset/2 validates context-specific words” do for invalid <- [“my demo app”, “mydemo_app”, “mydemoapp1”] do changeset = User.changeset(%User{}, %{“username” => “john.doe”, “password” => invalid}) assert changeset.errors[:password] == {“is too similar to username, email or My Demo App”, []} end
end
test “changeset/2 validates repetitive and sequential password” do changeset = User.changeset(%User{}, %{“password” => “secret1222”}) assert changeset.errors[:password] == {“has repetitive characters”, []}
end end
https://github.com/open-telemetry/opentelemetry-erlang-contrib
What is OpenTelemetry?
OpenTelemetry is an open-source observability framework that provides a vendor-agnostic way to instrument applications for monitoring and tracing purposes. The framework offers a range of components and libraries that can be used to collect and report metrics, logs, and traces from applications. By leveraging OpenTelemetry, developers can gain a deeper understanding of their application’s behavior, identify performance bottlenecks, and make data-driven decisions to optimize their systems.
OpenTelemetry in Erlang and Elixir
The OpenTelemetry project provides a range of libraries and tools for Erlang and Elixir developers to instrument their applications. The open-telemetry-erlang-contrib repository, available on GitHub, offers a set of pre-built instrumentation libraries for Erlang and Elixir. These libraries provide a simple and easy-to-use interface for collecting and reporting metrics, logs, and traces from Erlang and Elixir applications.
Benefits of Using OpenTelemetry in Erlang and Elixir
There are several benefits to using OpenTelemetry in Erlang and Elixir applications. Some of the key advantages include:
- Improved Monitoring and Troubleshooting: By leveraging OpenTelemetry, developers can gain a deeper understanding of their application’s behavior and identify performance bottlenecks more easily.
- Increased Visibility: OpenTelemetry provides a vendor-agnostic way to collect and report metrics, logs, and traces from applications, giving developers a more complete picture of system performance.
- Better Data-Driven Decision Making: By leveraging OpenTelemetry, developers can make data-driven decisions to optimize their systems and improve overall performance.
Getting Started with OpenTelemetry in Erlang and Elixir
To get started with OpenTelemetry in Erlang and Elixir, developers can follow these steps:
- Install the OpenTelemetry library: Install the OpenTelemetry library for Erlang and Elixir using the instructions provided in the open-telemetry-erlang-contrib repository.
- Instrument Your Application: Use the OpenTelemetry library to instrument your Erlang and Elixir applications and collect metrics, logs, and traces.
- Configure OpenTelemetry: Configure OpenTelemetry to report metrics, logs, and traces to a compatible backend, such as a monitoring system or logging platform.
https://github.com/tompave/fun_with_flags
Introduction to Feature Flags in Elixir
Elixir is a dynamic, functional language designed for building scalable and maintainable applications. One of the key aspects of developing such applications is the ability to quickly and safely introduce new features. This is where feature flags come into play. Feature flags, also known as feature toggles, allow developers to enable or disable features in their application without requiring a full deployment. In this article, we’ll explore how to use feature flags in Elixir with the fun_with_flags library.
The fun_with_flags library provides a simple and elegant way to manage feature flags in your Elixir application. With its easy-to-use API, you can quickly integrate feature flags into your development workflow. To get started, simply add fun_with_flags to your mix.exs file and run mix deps.get.
Using Fun With Flags
Using fun_with_flags is straightforward. Once you’ve added the library to your project, you can start defining your feature flags. For example, let’s say you want to introduce a new feature that allows users to upload profile pictures. You can define a feature flag for this feature like so: FunWithFlags.enable(:profile_picture_uploads). You can then use this feature flag in your application code to conditionally enable or disable the feature.
For more information on how to use fun_with_flags, check out the library’s GitHub page. The documentation provides a comprehensive guide on how to get started with feature flags in your Elixir application.
Best Practices for Feature Flags
When using feature flags, it’s essential to follow best practices to ensure they are used effectively. One key best practice is to keep your feature flags organized. This can be achieved by using a consistent naming convention for your feature flags. Another best practice is to ensure that your feature flags are properly tested. This can be done by writing tests that cover the different scenarios in which the feature flag is used.
By following these best practices and using fun_with_flags, you can safely and quickly introduce new features into your Elixir application. Remember to always keep your feature flags organized and properly tested to ensure they are used effectively.
As we’ve seen, feature flags are a powerful tool for introducing new features into your Elixir application. By using fun_with_flags, you can quickly and safely manage feature flags in your application. To learn more about fun_with_flags and how to use it in your Elixir project, be sure to check out the library’s GitHub page. With the right tools and best practices, you can take your Elixir development to the next level.
https://github.com/edgurgel/mimic
Mimic is a powerful mocking library for Elixir, designed to make testing easier and more efficient. This library provides a robust set of features for creating and managing mock objects, allowing developers to isolate dependencies and focus on testing specific components of their application.
Features of edgurgel/mimic
edgurgel/mimic offers a range of features that make it an ideal choice for Elixir developers. Some of the key features include:
1. Easy Mock Object Creation
edgurgel/mimic provides a simple and intuitive API for creating mock objects. With just a few lines of code, you can create a mock object that mimics the behavior of a real object, allowing you to test specific scenarios without affecting the rest of your application.
2. Flexible Mocking Options
edgurgel/mimic offers a range of mocking options, including stubbing, mocking, and spying. This flexibility allows you to choose the approach that best fits your testing needs, making it easier to write effective tests.
3. Support for Elixir’s Built-in Testing Framework
edgurgel/mimic is designed to work seamlessly with Elixir’s built-in testing framework, making it easy to integrate into your existing testing workflow.
Example Use Cases
edgurgel/mimic is a versatile library that can be used in a variety of scenarios. Here are a few example use cases to get you started:
1. Testing a Service Layer
Suppose you have a service layer that depends on a database connection. You can use edgurgel/mimic to create a mock database connection and test the service layer without affecting the real database.
2. Testing a Controller
Similarly, you can use edgurgel/mimic to create mock objects for controllers, allowing you to test the controller’s behavior without affecting the underlying dependencies.
Conclusion
edgurgel/mimic is a powerful mocking library for Elixir that makes testing easier and more efficient. With its flexible features and seamless integration with Elixir’s built-in testing framework, it’s an ideal choice for developers looking to take their testing to the next level.
Visit the official edgurgel/mimic repository to learn more about this library and start using it in your projects today.
External Resource
Action Points
- Add edgurgel/mimic to your project’s dependencies
- Start using edgurgel/mimic to create mock objects and test your application
- Explore the official repository for more information and examples
